To measure vacuum, connect a suitable vacuum gauge to the system and read the pressure below local atmospheric pressure. For shallow vacuum, use a compound pressure gauge or manometer. For deep vacuum, use an absolute vacuum gauge, such as a thermocouple, Pirani, or capacitance manometer gauge. In U.S. HVAC work, deep vacuum is usually measured in microns, where one micron equals one micrometer of mercury, or 0.001 Torr.
The correct method depends on the vacuum level, the gas in the system, the size of the chamber, and the accuracy you need. A gauge that works for a vacuum pump inlet may not work for a refrigeration system or laboratory chamber.

What does vacuum mean?
Vacuum is a pressure lower than the air pressure around us. It is not usually a total absence of matter. Even a strong vacuum contains some gas molecules.
At sea level in the United States, normal atmospheric pressure is about:
- 14.7 pounds per square inch absolute (psia)
- 29.92 inches of mercury absolute (inHgA)
- 101.325 kilopascals (kPa)
- 760 Torr
- 760,000 microns
As pressure falls, the vacuum becomes deeper.
Absolute pressure versus gauge pressure
A vacuum reading can use two different reference points:
- Absolute pressure measures pressure from a perfect vacuum.
- Gauge pressure measures pressure compared with the air around the gauge.
This difference can cause confusion.
A gauge that reads 0 psig may still have about 14.7 psia inside it because it is reading the same pressure as the surrounding air. A gauge that reads -14.7 psig at sea level is close to a perfect vacuum, although real conditions and gauge accuracy affect the result.
The basic relationship is:
Absolute pressure = atmospheric pressure + gauge pressure
For a vacuum gauge that displays a negative value:
Absolute pressure = atmospheric pressure − vacuum reading
For example, if local atmospheric pressure is 14.5 psia and a gauge reads -10.0 psig:
14.5 − 10.0 = 4.5 psia absolute
Common vacuum units
| Unit | Meaning | Common use |
|---|---|---|
| Pa or kPa | Pascal or kilopascal | Science, engineering, SI systems |
| psia | Pounds per square inch absolute | Engineering and process work |
| psig | Pounds per square inch gauge | General pressure work |
| inHg | Inches of mercury | HVAC and weather instruments |
| Torr | Pressure unit based on mercury | Laboratory and vacuum work |
| micron | One-thousandth of a Torr | Deep vacuum and refrigeration evacuation |
| mbar | Millibar | Industrial and laboratory vacuum work |
A micron in vacuum work normally means one micron of mercury, not one micron of distance. The terms micron and mTorr are often used in the same practical range because 1 micron equals 1 mTorr.

Choose the right vacuum gauge
The gauge must match the vacuum range and the job. A simple compound gauge is useful for a rough check, but it cannot show a deep vacuum with enough detail.
Compound pressure gauge
A compound gauge displays both positive pressure and a rough vacuum. It is common on HVAC service manifolds and vacuum pumps.
Use it for:
- Checking whether a system is below atmospheric pressure
- Finding a large leak
- Watching a pump pull down
- Making a quick service check
Do not use it to confirm a deep evacuation. Its vacuum scale is usually too coarse. A reading near 29 inHg does not prove that a refrigeration system has reached 500 microns.
U-tube manometer
A manometer uses a liquid column to compare pressure. The pressure difference moves the liquid, and the height difference gives the reading.
A manometer can be very accurate for low and moderate pressure differences. It is less convenient for portable field work. The liquid, tube size, temperature, and orientation all affect the result.
For a water manometer:
Pressure difference = liquid density × gravity × height difference
The result is usually expressed in pascals when SI units are used.
Bourdon vacuum gauge
A Bourdon gauge uses a curved metal tube that changes shape as pressure changes. It is rugged and simple, but it is not a high-accuracy deep-vacuum instrument.
A Bourdon gauge works best when you need:
- A rough vacuum indication
- A durable mechanical gauge
- A quick process check
- A broad pressure range
Thermocouple or Pirani gauge
These gauges estimate pressure by measuring how well the gas carries heat away from a heated wire or sensor.
They are useful for roughing and medium-to-high vacuum ranges. Their reading depends on the gas type and gas composition. A reading taken in air may differ from a reading taken in nitrogen, refrigerant vapor, or another gas.
Capacitance manometer
A capacitance manometer measures the movement of a flexible diaphragm. It measures pressure more directly than a thermal conductivity gauge.
Its main benefits are:
- Good accuracy
- Low dependence on gas type
- Useful process measurements
- Stable readings over a defined pressure range
The sensor must still be selected for the pressure range. A gauge designed for high pressure may not resolve a very low pressure well.
Ionization gauge
An ionization gauge is used for high and ultra-high vacuum. It measures ions formed by electrons in the gas.
This type of gauge is not normally needed for HVAC service, vacuum packaging, or basic pump testing. It also requires careful operation because the gauge can be damaged if turned on at too high a pressure.
Which gauge should you use?
| Task | Best starting tool | Why |
|---|---|---|
| Check a vacuum cleaner or suction line | Differential pressure gauge or manometer | Measures pressure difference across the device |
| Check a vacuum pump | Compound gauge for rough checks; absolute gauge for performance | Shows both pull-down and final pressure |
| Evacuate an HVAC or refrigeration system | Micron gauge | Shows deep vacuum clearly |
| Measure a laboratory chamber | Absolute vacuum gauge matched to range | Gives a pressure referenced to absolute zero |
| Measure a small pressure difference | Differential manometer | Sensitive to small changes |
| Measure high or ultra-high vacuum | Suitable thermal or ionization gauge | Designed for very low pressure |
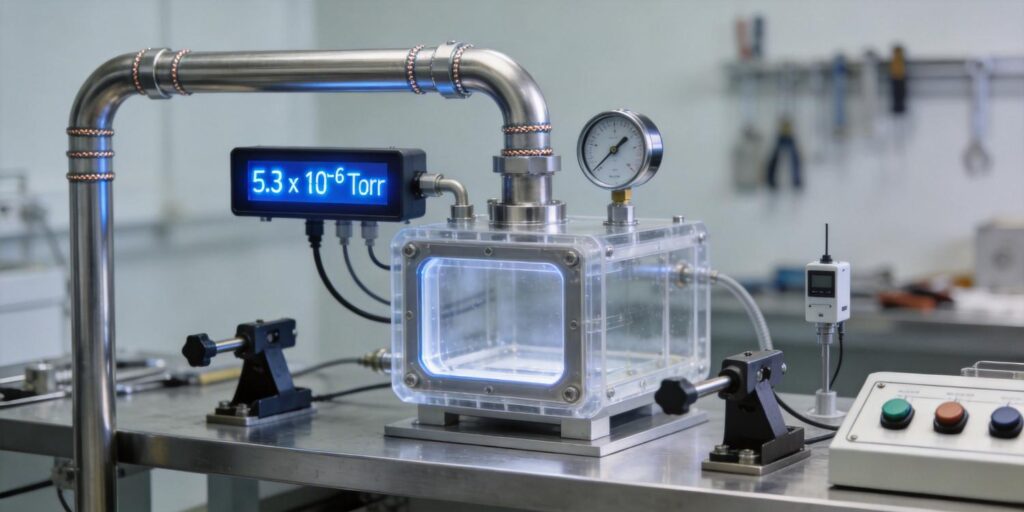
How to measure vacuum with a vacuum gauge
Use this process for a pump, chamber, tank, or other system that is designed for vacuum service.
1. Confirm the system is safe for vacuum
Before connecting a pump, check that the vessel, hose, fittings, and valves can withstand external atmospheric pressure.
A container designed only for internal pressure may collapse when evacuated. Glass can implode. Some plastic containers can deform or fail without warning.
Do not evacuate a container that has not been rated for vacuum. Use a shield when required by the equipment maker or workplace procedure.
2. Check the gauge range and units
Read the gauge label before use. Confirm:
- The lowest pressure it can measure
- Whether it reads absolute or gauge pressure
- The selected pressure unit
- The gas or calibration conditions
- The maximum pressure the sensor can tolerate
- Whether the gauge needs zeroing or calibration
A gauge may display several units at once. Make sure you record one unit clearly.
3. Install the gauge at a useful location
Place the sensor as close as practical to the chamber or system being measured. A long, narrow hose between the system and the gauge can restrict gas flow and create a false reading.
For HVAC evacuation, place the micron gauge at the system or at a large service port. Do not rely only on the vacuum pump’s built-in gauge. The pump gauge may show the pressure at the pump, not the pressure inside the equipment.
Keep the sensor away from:
- Pump oil mist
- Liquid water
- Liquid refrigerant
- Dirt and sealant
- Strong vibration
- Excessive heat
Use a clean hose and fittings with a large internal passage when fast evacuation matters.
4. Check for leaks in the measuring setup
A leaking hose, core tool, valve, or sensor connection can make the system appear unable to reach a deep vacuum.
Inspect:
- Hose ends
- O-rings
- Valve stems
- Schrader cores
- Access ports
- Gauge seals
- Pump isolation valves
A leak test on the gauge assembly can save time. If the gauge, hose, and pump cannot hold a vacuum by themselves, the system reading will not be reliable.
5. Start the pump and watch the reading
Open the correct valve slowly if the equipment procedure allows it. Watch how the reading changes.
A normal pump-down often shows:
- A fast pressure drop at the start
- A slower drop as moisture and trapped gas leave
- A stable reading near the pump and system limit
Do not judge the result only by how quickly the gauge moves. A fast initial drop can occur even when a leak remains.
6. Isolate the pump
Close the valve between the pump and the system, or use the system’s isolation method. Then watch the pressure for a set period.
This is called a standing vacuum test or decay test.
- If the pressure stays nearly steady, the system may be tight and dry.
- If pressure rises quickly and continues rising, suspect a leak or an open path to the atmosphere.
- If pressure rises slowly and then levels off, moisture or outgassing may be present.
- If the reading changes sharply when the sensor moves, suspect sensor placement, contamination, or a connection problem.
A pressure rise alone does not identify the cause. Leak testing and moisture removal require separate checks.
7. Record the result with conditions
Write down:
- Gauge type
- Unit
- Starting pressure
- Lowest pressure reached
- Time at the lowest reading
- Standing test duration
- Temperature
- Valve position
- Whether the pump was isolated
A reading without conditions is hard to compare later.

How to measure deep vacuum in HVAC and refrigeration systems
Use a calibrated micron gauge for deep evacuation. A standard manifold vacuum scale is not precise enough for this task.
Why HVAC technicians use microns
At a deep vacuum, small pressure changes are difficult to see on an inches-of-mercury scale. For example, a gauge may remain close to 29 inHg while the actual pressure changes from several thousand microns to a few hundred microns.
The micron scale makes these changes easier to see:
- 5,000 microns: rough vacuum
- 1,000 microns: deeper vacuum
- 500 microns: a commonly used evacuation target in many service procedures
- 100 microns: deeper still
These values are examples of scale, not universal pass or fail rules. Always follow the equipment manufacturer’s instructions and the applicable service procedure.
A practical HVAC measurement sequence
- Recover refrigerant according to the required procedure.
- Repair confirmed leaks before evacuation.
- Remove restrictions that slow evacuation, such as service cores when the approved tools allow it.
- Connect a vacuum pump with clean, large-bore hoses.
- Put the micron gauge on the system side, away from the pump.
- Open the valves and start the pump.
- Continue evacuation until the required pressure is reached.
- Isolate the pump from the system.
- Watch the micron reading during the standing test.
- Investigate any unacceptable rise before charging the system.
A low reading at the pump does not prove that the entire system is at the same pressure. Flow resistance can create a pressure difference between the pump and the far end of the equipment.
The decay test matters
A system can reach a low reading and still have a leak. The standing test checks whether the pressure remains stable after the pump is isolated.
A rising micron reading may result from:
- A system leak
- Moisture boiling off
- Refrigerant or solvent vapor
- Hose permeation
- A leaking valve or core
- A dirty or wet micron sensor
- A temperature change
- Outgassing from materials
Use controlled isolation and, when needed, a dry nitrogen pressure test or approved leak detection method. Do not add refrigerant or nitrogen just to force a misleading reading.
Why temperature affects the reading
Water boils at a lower temperature when pressure drops. Moisture inside a system can therefore turn into vapor during evacuation. Cold areas may hold moisture longer, while warm areas may release it faster.
This is why a system can stall at a certain vacuum level, then improve after warming, drying, or using a procedure designed for moisture removal. Do not heat a system unless the equipment and refrigerant procedure permit it.

How to convert vacuum readings
Conversions help when a gauge and a specification use different units. They do not make an inaccurate gauge more accurate.
Convert microns to Torr
Because one Torr equals 1,000 microns:
Torr = microns ÷ 1,000
Example:
500 microns ÷ 1,000 = 0.5 Torr
Convert Torr to pascals
One Torr is about 133.322 pascals:
Pa = Torr × 133.322
Example:
0.5 Torr × 133.322 = 66.7 Pa
So, 500 microns is about 66.7 pascals absolute.
Convert absolute pressure to gauge pressure
At standard atmospheric pressure:
psig = psia − 14.696
Example:
2.0 psia − 14.696 = −12.696 psig
This is only an estimate if local atmospheric pressure differs from standard pressure. Weather, altitude, and indoor conditions can change the actual atmospheric reference.
Convert absolute pressure to inches of mercury
A rough relationship is:
inHg vacuum = local atmospheric pressure in inHg − absolute pressure in inHg
At standard atmosphere, a pressure near 500 microns is so low that the reading is close to 29.90 inHg vacuum. The difference is small on that scale, which explains why an inHg gauge cannot show the detail of a micron gauge.

How to measure vacuum in a vacuum cleaner or suction system
A vacuum cleaner creates a pressure difference. It does not create a perfect vacuum inside the hose.
To measure it:
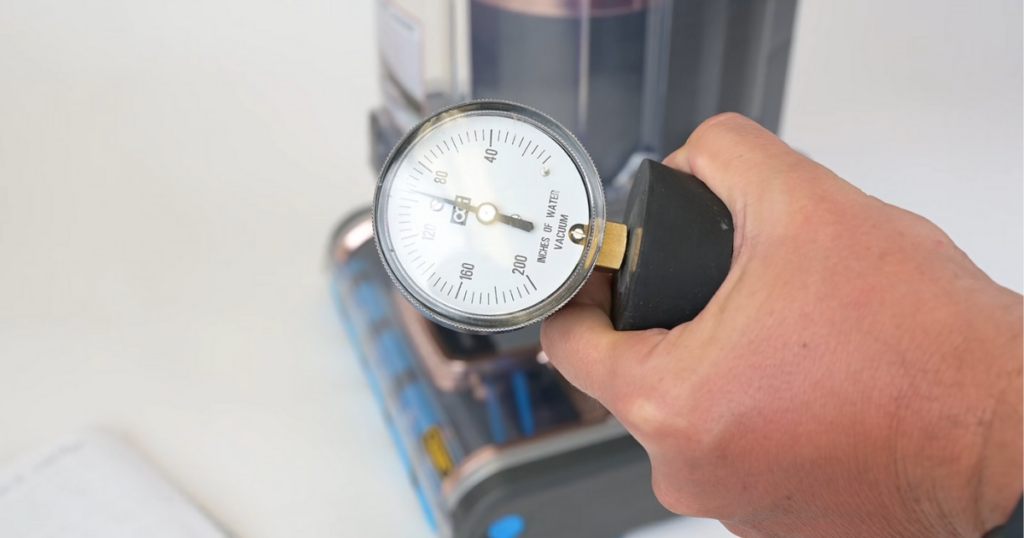
- Use a differential pressure gauge or manometer.
- Measure with the hose open, unless the manufacturer specifies another test.
- Keep the filter, bag, and hose in the condition you want to evaluate.
- Record the pressure difference and airflow condition.
- Repeat the test with a blocked or restricted inlet only if the equipment test procedure permits it.
A blocked-inlet test can show maximum suction, but it does not represent normal cleaning performance. Airflow falls when the inlet is blocked.
For a useful comparison, record both:
- Static suction: pressure difference with little or no airflow
- Operating suction: pressure difference while air moves through the hose and tool
The same vacuum cleaner can show strong static suction but poor operating performance if the filter is clogged, the hose is restricted, or the airflow path leaks.
Never place a vacuum gauge where liquid, dust, or debris can enter the sensor.

Common vacuum measurement mistakes
Using a compound gauge for deep vacuum
A compound gauge may show a near-maximum vacuum while the actual pressure is still too high. Use a micron or absolute gauge for deep-vacuum work.
Reading the pump instead of the system
The pump inlet may have a lower pressure than the far side of the system. Measure at the system when the system condition is the goal.
Leaving the gauge on the pump
This can hide restrictions in hoses, valves, or service ports. Move the gauge to the system side for a more useful reading.
Ignoring gas dependence
Thermal gauges can respond differently to different gases. Check the gauge manual before comparing readings from air, nitrogen, refrigerant vapor, or another gas.
Measuring through a narrow hose
A small hose can restrict flow. The gauge may show a delayed or misleading pressure, especially during pump-down.
Failing to clean the sensor
Oil, moisture, and dirt can cause slow response or false readings. Clean the sensor only by the method approved by its manufacturer.
Treating a low reading as proof of a leak-free system
A system can reach a low pressure and then rise after isolation. Always use a suitable standing test and investigate the trend.
Forgetting altitude and weather
Gauge pressure depends on local atmospheric pressure. Absolute pressure does not use the surrounding air as its zero point.
Opening a system under vacuum
If a system is under vacuum, opening an unprotected valve can draw in air, moisture, or contaminants. Follow the equipment procedure and use the correct isolation method.

What should you do if the vacuum will not improve?
Check the problem in this order:
- Confirm the gauge reading. Check the unit, range, battery, zero, and calibration status.
- Inspect the connections. Look for loose fittings, damaged seals, leaking cores, and open valves.
- Check the hose path. Remove restrictions and use clean, large-bore hoses where suitable.
- Check the pump. Confirm the oil level, oil condition, inlet filter, and pump operation.
- Look for moisture. A slow stall and gradual improvement can point to water vapor or outgassing.
- Test for leaks. Use an approved pressure or leak test procedure.
- Check sensor placement. A wet or contaminated sensor can give a false result.
- Review temperature. Cold surfaces may hold moisture and extend evacuation time.
Stop if the equipment becomes hot, unstable, damaged, or unsafe. For pressure vessels, refrigeration systems, and industrial equipment, use the manufacturer’s procedure or a qualified technician.

Safety limits when measuring vacuum
Vacuum work can cause implosion, chemical exposure, frostbite, electrical hazards, and equipment damage.
Follow these rules:
- Use vessels rated for external pressure.
- Protect glass chambers with a shield.
- Keep body parts away from possible failure paths.
- Use hoses and fittings rated for the pressure and chemical service.
- Wear eye protection and suitable gloves.
- Prevent liquid refrigerant or solvent from entering a vacuum sensor.
- Do not heat sealed containers under vacuum.
- Keep ignition sources away from flammable vapors.
- Follow refrigerant recovery and handling rules in the United States.
- De-energize equipment before changing electrical connections.
- Do not rely on a gauge as the only safety control.
A vacuum reading tells you pressure. It does not prove that a container is structurally safe, that a refrigerant system is leak-free, or that a process is free of toxic or flammable material.
Frequently asked questions
Is a vacuum gauge the same as a pressure gauge?
No. A pressure gauge may measure pressure above atmospheric pressure. A vacuum gauge measures pressure below atmospheric pressure. An absolute pressure gauge can measure both conditions from a reference close to zero pressure.
What is the best unit for measuring deep vacuum?
Microns are practical for HVAC and refrigeration evacuation. Pascals, Torr, and millibars are common in laboratories and industry. Use the unit required by the equipment specification or service procedure.
Can I measure vacuum with a multimeter?
A standard multimeter cannot measure vacuum. Some specialty instruments accept a vacuum sensor, but the sensor is the part that measures pressure.
Why does my gauge read zero when the system is under vacuum?
The gauge may be using gauge pressure and may not be connected to the correct port. It may also have a closed valve, a blocked hose, a dead battery, or a pressure range that is not suitable for the vacuum level.
How long should a vacuum hold?
There is no single time that applies to every system. Hold time depends on system volume, temperature, moisture, hose volume, allowable pressure rise, and the equipment maker’s procedure. A stable trend is more useful than a time value taken without conditions.
Key takeaways
- Measure vacuum with a gauge suited to the pressure range.
- Use an absolute or micron gauge for deep vacuum.
- Place the gauge near the system, not only at the pump.
- Check hoses, valves, seals, and sensor condition before trusting the result.
- Isolate the pump and watch for pressure rise.
- Record the unit, temperature, gauge type, and test conditions.
- Treat vacuum equipment as a safety issue, especially with glass, pressure vessels, refrigerants, and flammable vapors.
Final answer: how to measure vacuum correctly
Connect a suitable vacuum gauge to the system, verify the gauge range and units, start the pump or process, and monitor the pressure as it falls. For a rough vacuum, a compound gauge or manometer may be enough. For HVAC, refrigeration, and other deep-vacuum work, use a micron gauge placed on the system side. After reaching the target, isolate the pump and observe whether the pressure remains stable.
For technical reference, pressure units and SI relationships can be checked through the U.S. National Institute of Standards and Technology and the NIST Guide for the Use of the International System of Units. Always give priority to the equipment manufacturer’s instructions and applicable U.S. safety requirements.