
For most car air-conditioning repairs, pull a vacuum for at least 30 minutes after the system has been opened. A better test is to keep the vacuum pump running until the system reaches about 500 microns or lower, then close the valves and watch for pressure rise.
Time alone does not prove that the AC system is dry or leak-free. A small car AC system may reach a deep vacuum in 20 minutes, while a wet system, long hose set, cold day, or weak pump may need 45 minutes or more.
The safest rule is simple:
Follow the vehicle service manual, use a micron gauge, and confirm that the vacuum holds before adding refrigerant.
This guide applies to vehicles in the United States, including cars that use R-134a and newer vehicles that use R-1234yf refrigerant.
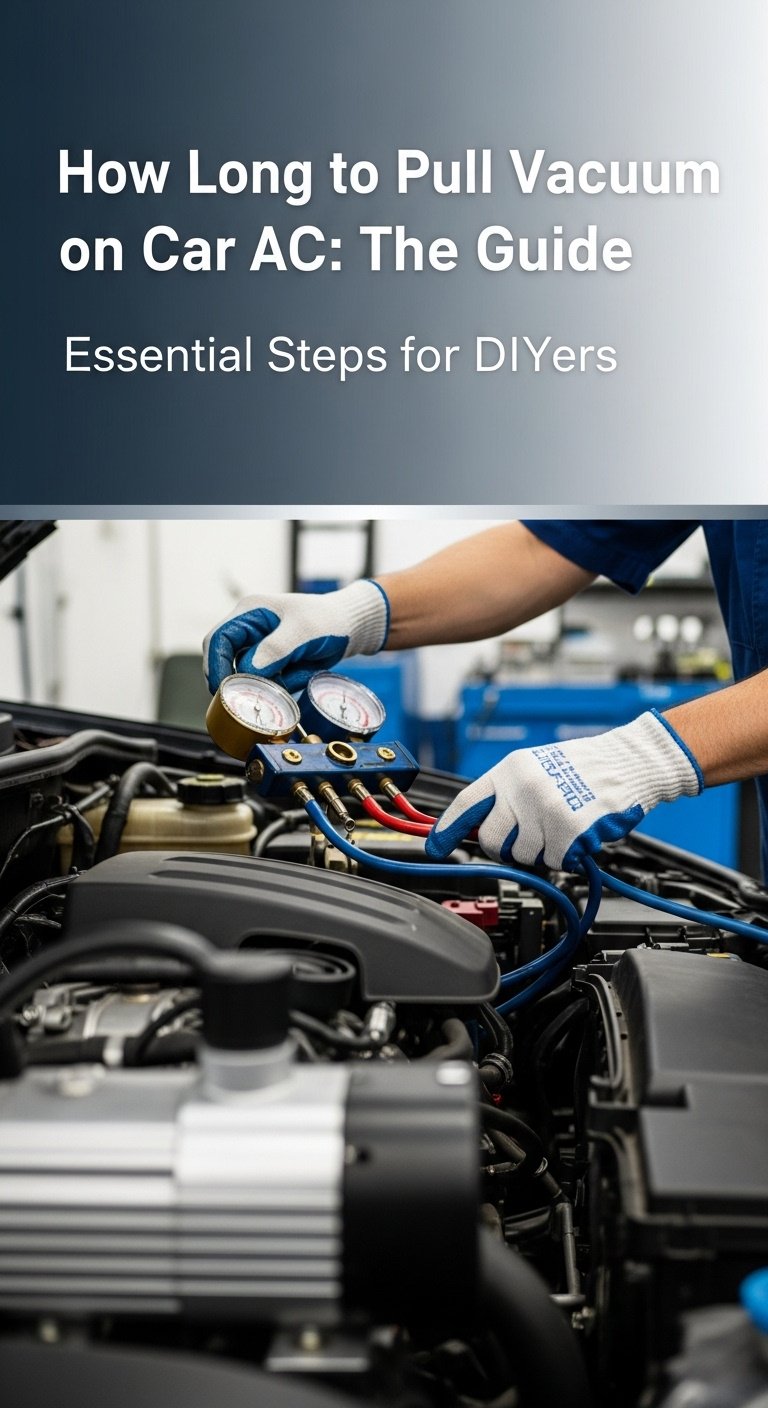
What pulling a vacuum does in a car AC system
Pulling a vacuum removes air, moisture, and other gases from the closed AC system. These contaminants can cause poor cooling, corrosion, high pressure, and compressor damage.
When the vacuum pump lowers system pressure, water boils at a much lower temperature. The pump can then remove water vapor through the service hoses.
A vacuum also helps reveal leaks. However, it is not a complete leak test. A system may hold a vacuum and still leak refrigerant under pressure. For that reason, technicians often use an approved electronic leak detector or an approved leak-test method after evacuation.
Why moisture is harmful
Moisture inside an AC system can:
- Freeze at the expansion device
- Restrict refrigerant flow
- React with refrigerant oil
- Promote internal corrosion
- Reduce cooling performance
- Damage the compressor over time
A brief vacuum may remove some air but leave moisture behind. This is why a 5-minute vacuum is usually not enough after a major repair.
What “500 microns” means
A micron is a small unit of pressure used to measure deep vacuum. The number becomes smaller as the vacuum gets deeper.
A standard manifold gauge may show “29 inches of mercury,” but that reading is not precise enough to confirm a deep vacuum. A micron gauge gives a much clearer result.
A common professional target is:
- 500 microns or lower before isolation
- A stable reading after the pump is shut off
- No rapid rise that suggests a leak or remaining moisture
The vehicle maker may specify a different procedure. That instruction takes priority.

How long should you pull a vacuum on car AC?
The usual starting point is 30 minutes, but the correct time depends on the repair and the condition of the system.
| AC system condition | Typical starting time | Better confirmation |
|---|---|---|
| System opened briefly for a small repair | 20–30 minutes | Reaches the specified micron level and holds |
| System opened for several hours | 30–45 minutes | Deep vacuum with a stable decay test |
| Compressor or evaporator replaced | 45–60 minutes or more | Manufacturer procedure plus micron test |
| System exposed to humid air | 45–90 minutes may be needed | Low micron reading with slow pressure rise |
| New parts or hoses installed | 30–60 minutes | Stable vacuum after isolation |
| Unknown condition or suspected moisture | Do not use time alone | Diagnose contamination and leaks first |
These are practical starting ranges, not universal specifications. Pump performance, hose length, ambient temperature, oil condition, and system size all affect the result.
A useful rule for most repairs
For a typical passenger vehicle in the United States:
- Connect a clean, properly sized vacuum pump.
- Pull the vacuum for 30 minutes.
- Check the micron gauge.
- Close the manifold or core tools.
- Turn off the pump.
- Watch the vacuum for about 10 minutes.
If the system reaches 500 microns and stays reasonably stable, it may be ready for refrigerant. If the reading rises quickly, do not charge the system yet.
Why time alone can mislead you
A pump can run for an hour and still fail to remove moisture if:
- The pump oil is dirty or full of water
- The hoses are too long or too narrow
- Valve cores restrict flow
- The system has a large leak
- The pump has poor capacity
- The micron gauge is connected in the wrong place
- The temperature is very low
The clock measures run time. It does not measure dryness.
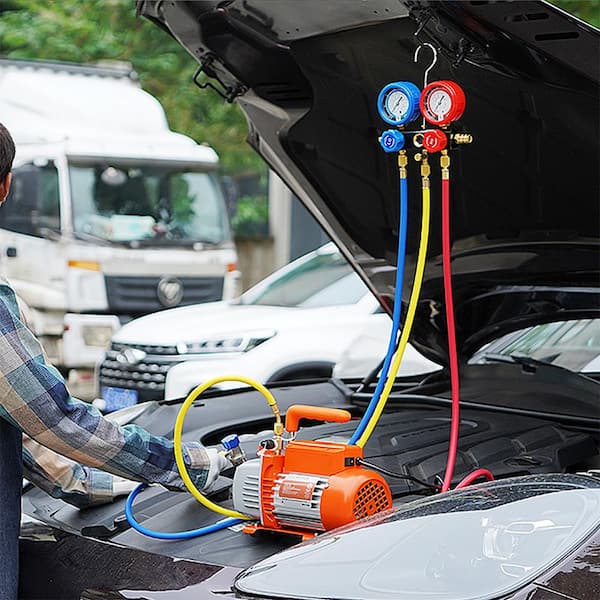
Step-by-step: how to pull a vacuum on car AC
Only work on an AC system if you have the right recovery equipment, gauges, hoses, vacuum pump, and refrigerant information. Do not vent refrigerant into the air.
1. Identify the refrigerant
Check the label under the hood or the vehicle service information. Common refrigerants include:
- R-134a
- R-1234yf
Do not mix refrigerants or use fittings made for the wrong type. R-1234yf systems need equipment approved for that refrigerant.
The label may also list the correct refrigerant charge. The charge amount is normally measured by weight, not by pressure alone.
2. Recover the old refrigerant
If refrigerant remains in the system, recover it with approved recovery equipment. In the United States, the U.S. Environmental Protection Agency regulates refrigerant handling under Section 609 of the Clean Air Act.
Never loosen an AC line to “see if it has pressure.” Liquid refrigerant can cause severe cold burns, and refrigerant vapor can harm your eyes and lungs.
Wear safety glasses and gloves. Keep the work area well ventilated.
3. Repair the cause of the problem
Replace failed parts before evacuation. Common repairs include:
- O-rings
- Service port cores
- Condensers
- Compressors
- Evaporators
- Accumulators
- Receiver-driers
- Expansion valves
Replace the receiver-drier or accumulator when the vehicle maker requires it. These parts absorb moisture and may become saturated after the system is open.
Add the correct type and amount of refrigerant oil if the repair requires it. Too much oil can reduce cooling and harm the compressor.
4. Connect the equipment correctly
Connect the:
- Blue hose to the low-side service port
- Red hose to the high-side service port
- Center hose to the vacuum pump or recovery equipment
Use short, large-bore evacuation hoses when possible. Remove valve cores with approved tools if the service procedure allows it. This can improve flow, but use care because the fittings and cores must be installed correctly before charging.
Place the micron gauge on the system side of the manifold or isolation valves. A gauge mounted only at the vacuum pump may show the pump’s vacuum instead of the vacuum inside the vehicle.
5. Open the valves and start the pump
Open the appropriate manifold valves, then start the pump. Watch the micron reading.
The reading may fall quickly at first. It may then slow as moisture evaporates. A rise and fall in the reading can occur while the system dries.
Do not judge the process by the manifold gauge alone. Use the micron gauge and the service manual’s target.
6. Continue until the system reaches the target
For many systems, continue until the gauge reaches approximately 500 microns or lower. If the reading stops at a high value, investigate before adding refrigerant.
A system that has been open for a long time may need more than 30 minutes. On a humid day, moisture can take longer to remove.
7. Perform a vacuum decay test
Close the valves between the system and the pump. Then shut off the pump.
Watch the micron gauge for about 10 minutes. The exact acceptable rise depends on the vehicle maker and the shop’s test method. A rapid rise points to a problem.
Possible causes include:
- A refrigerant leak
- A loose hose connection
- A leaking manifold valve
- A faulty service port core
- Moisture still boiling out
- A damaged micron gauge or sensor
A slow rise may occur as trapped moisture warms. A fast, steady rise often suggests a leak or equipment problem.
8. Charge by weight
If the vacuum holds, charge the system with the exact refrigerant type and amount listed by the vehicle manufacturer.
Use a scale. Do not fill by low-side pressure alone. Pressure changes with outdoor temperature, airflow, engine speed, and system design.
After charging, inspect for leaks and check cooling performance according to the vehicle service procedure.

What to do if the vacuum will not hold
A vacuum that rises after the pump stops does not identify the problem by itself. Use the test pattern to guide the next check.
The reading rises immediately
A rapid rise often means a leak in the vehicle or the test setup.
Check:
- Hose fittings
- Manifold valves
- Service port adapters
- Valve cores
- Compressor shaft seal area
- Condenser and evaporator connections
- O-rings
- Newly installed components
Isolate sections of the equipment when possible. For example, test the hoses and manifold separately from the vehicle. This prevents replacing a vehicle part when the actual leak is in the gauge set.
The reading falls very slowly
A slow drop may indicate:
- A restricted hose
- Closed or partly closed valve
- A weak vacuum pump
- Dirty pump oil
- Valve cores that were not removed
- A micron gauge problem
Change the pump oil if it looks cloudy or dirty. Confirm that the pump reaches a deep vacuum with the hoses disconnected from the vehicle, following the pump maker’s instructions.
The reading reaches a low number but then rises slowly
This can mean moisture is still evaporating. It may also indicate a small leak.
Allow the system to continue evacuating, especially if the system was open in damp weather. If the reading continues to rise after repeated evacuation, perform a proper pressure leak test.
Do not assume that a vacuum rise always proves a leak. Moisture and outgassing from hoses can also raise the reading.
The vacuum never reaches 500 microns
Do not add refrigerant just because the pump has run for a long time. Check the pump, oil, hoses, connections, gauge, and vehicle for leaks.
If the system has a major leak, repair it first. A vacuum pump cannot repair a leaking condenser, hose, evaporator, or compressor seal.

Vacuum pump and gauge setup matters
The equipment can change the evacuation time as much as the vehicle can.
Use clean pump oil
Vacuum pump oil absorbs moisture from the AC system. Old or contaminated oil reduces pump performance.
Check the oil before each job. Follow the pump manufacturer’s instructions for oil type, level, and replacement.
Use proper evacuation hoses
Standard charging hoses may restrict flow. Large-bore vacuum hoses usually remove air and moisture more effectively.
Avoid unnecessary hose length. Each connection adds another possible leak point.
Use a micron gauge
A micron gauge helps answer the question that a manifold gauge cannot:
Is the vehicle system actually reaching and holding a deep vacuum?
Keep the sensor clean. Oil or debris on the sensor can produce false readings.
Warm conditions usually help
Moisture is easier to remove when the system and surrounding air are warmer. A cold vehicle may take longer to evacuate.
Do not heat AC parts with an open flame or unsafe heat source. Follow the equipment and vehicle maker’s safety instructions.
Valve-core tools can reduce restriction
Removing the Schrader valve cores during evacuation can improve flow. However, the tool must seal correctly, and the cores must be reinstalled or replaced before charging.
This step is useful for professional equipment but is not required for every basic service procedure.

Common mistakes when evacuating car AC
Avoid these errors because they can lead to poor cooling or compressor damage.
Pulling a vacuum for only five minutes
A short run may remove some air but leave moisture behind. It also gives little time to find a small leak.
Charging without a decay test
A system can reach a low reading while the pump is running and then lose that vacuum when isolated. Always test the hold before charging.
Using only the low-side pressure
Low-side pressure is not a reliable way to set the refrigerant charge. The correct charge is based on weight.
Reusing a saturated drier
A receiver-drier or accumulator that has absorbed moisture may not protect the repaired system. Follow the vehicle maker’s replacement instructions.
Mixing refrigerants or oils
R-134a and R-1234yf are different refrigerants. Compressor oils also have specific requirements. Use only the approved type and amount.
Treating vacuum as a complete leak test
A vacuum test is helpful, but pressure behavior can be different. A small leak may behave differently under positive pressure than under vacuum.
Leaving the system open during a delay
If the repair cannot be completed, cap the lines and ports. The longer the system stays open, the more moisture it can absorb.

When should a professional handle the job?
Use a qualified automotive AC technician when the system uses R-1234yf, the compressor has failed internally, the system is contaminated, or you do not have recovery equipment.
Professional service may be needed when:
- The refrigerant type is unknown
- The system contains sealant
- The compressor has spread metal debris
- The system will not hold a vacuum
- The vehicle has a high-voltage electric compressor
- The repair requires refrigerant recovery
- You suspect a blocked evaporator or expansion valve
Hybrid and electric vehicles may use electrically driven compressors. Some require specific nonconductive oil and special service procedures. Using the wrong oil can create a serious electrical safety risk.
Refrigerant must be recovered with approved equipment. Do not release it into the atmosphere.

Frequently asked questions
Is 30 minutes enough to vacuum a car AC system?
Thirty minutes is a common starting point for a typical repair, but it is not a guarantee. The system should reach the specified vacuum level and hold it after the pump is isolated.
Can you pull a vacuum for too long?
Longer evacuation is not normally harmful when the equipment is connected correctly and the pump has clean oil. However, extra time will not fix a leak, bad hose, closed valve, or damaged pump.
How long should a car AC vacuum hold?
There is no single time that applies to every vehicle. A properly evacuated system should show only a small, stable rise during the manufacturer’s decay test. A rapid rise requires diagnosis before charging.
Can I use a regular vacuum cleaner?
No. A household vacuum cleaner cannot create the correct deep vacuum, is not designed for refrigerant service, and may create a fire or equipment hazard.
Do I need to replace the receiver-drier after pulling a vacuum?
Not every evacuation requires replacement. Replace the receiver-drier or accumulator when the vehicle maker specifies it, especially after a major repair or long exposure to air.
Can vacuuming remove a leak?
No. Vacuuming can help reveal a leak, but it cannot seal or repair one. Find and repair the failed component before charging the AC system.
Conclusion
For most US vehicle AC repairs, begin with a 30-minute evacuation, then use a micron gauge to confirm the result. Aim for the vehicle maker’s specified vacuum, often around 500 microns or lower, and perform a vacuum decay test before charging.
If the vacuum rises quickly, stop and find the leak or equipment problem. Charge only with the correct refrigerant, by the specified weight, using approved recovery and service equipment.


One Comment