
For most cars in the United States, pull a vacuum on the air-conditioning system for at least 30 minutes after a repair. A system that was open for a long time, had a major leak, or contains extra moisture may need 45 to 60 minutes or more.
Time alone does not prove the system is ready. The better test is to use a micron gauge. Aim for a stable vacuum of about 500 microns or lower, then close the valves and watch for a rise. If the vacuum quickly rises, the system may have a leak or trapped moisture.
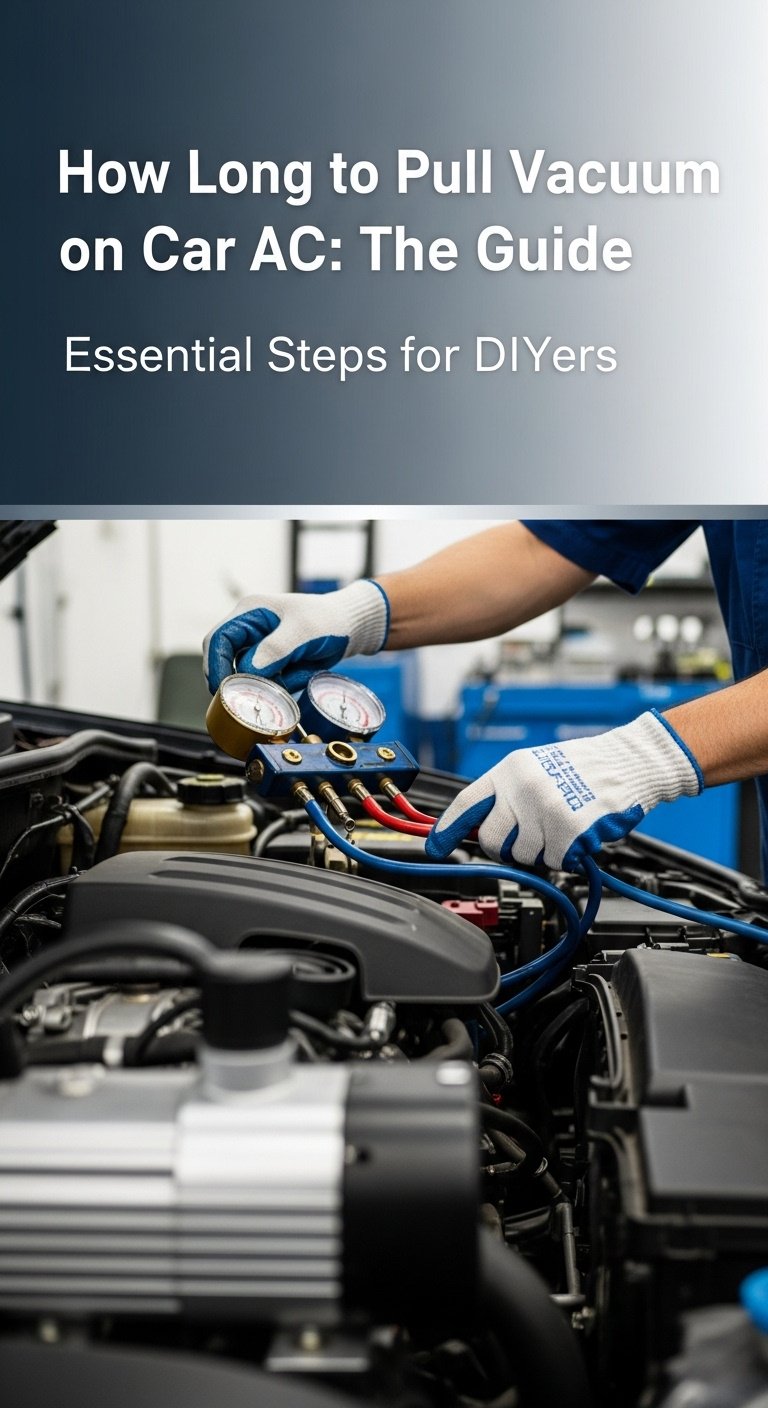
Why a Car AC System Needs a Vacuum
Pulling vacuum removes air and moisture from the air-conditioning system before you add refrigerant. Air does not belong inside a sealed AC circuit, and water can react with refrigerant and oil.
Moisture may freeze at the expansion valve or orifice tube. It can also contribute to corrosion and acid formation. These problems may reduce cooling and damage the compressor.
A vacuum pump does not remove a mechanical fault. It only removes air and moisture and helps test whether the system can hold a vacuum.
What “pulling vacuum” means
A vacuum pump lowers the pressure inside the AC system below normal air pressure. This causes moisture to boil at a lower temperature, which helps the pump remove it as vapor.
The process is also called:
- Evacuating the AC system
- Pulling down the system
- Evacuating the refrigerant circuit
- Vacuuming the car AC system
Do not confuse evacuation with refrigerant recovery. A recovery machine removes refrigerant and stores it in a tank. A vacuum pump removes air and moisture after the refrigerant has been recovered.
Why time is only a starting point
A small vacuum pump may remove air quickly but take longer to remove moisture. A large pump may pull down faster, but it cannot fix a leak or overcome a blocked hose.
The correct time depends on:
- How long the system was open
- The amount of moisture inside
- The size and condition of the vacuum pump
- Hose length and hose diameter
- The quality of the manifold, fittings, and seals
- Outside temperature
- Whether the compressor, condenser, evaporator, or receiver-drier was replaced
- The vehicle maker’s service instructions
A 30-minute evacuation is a common starting point, not a universal rule.

How Long Should You Pull Vacuum on a Car AC System?
For a typical car AC repair, pull vacuum for 30 to 45 minutes, then perform a vacuum-hold test. If the system was open to air for several days, pull vacuum for 45 to 60 minutes or longer.
Use this table as a practical guide:
| System condition | Suggested evacuation time | What to do next |
|---|---|---|
| Brief hose or component service | 20–30 minutes | Check the final vacuum and perform a hold test |
| Normal component replacement | 30–45 minutes | Confirm a stable vacuum before charging |
| System open for hours or days | 45–60 minutes | Watch for slow vacuum improvement |
| Major moisture exposure | 60 minutes or more | Consider a longer evacuation and a fresh receiver-drier |
| Vacuum will not reach a low level | Do not rely on time | Find the leak, restriction, or tool problem |
These times assume the system is properly connected and the pump is in good condition. Always follow the vehicle manufacturer’s procedure if it gives a different time or vacuum target.
The practical target: 500 microns or lower
A micron is a very small pressure unit used to measure deep vacuum. Many automotive technicians use a target of 500 microns or lower before charging an AC system.
A standard manifold gauge may show that the system is under vacuum, but it may not show whether the vacuum is deep enough. A digital micron gauge gives a more useful reading.
The reading should also remain stable. If the system reaches 500 microns but quickly rises after the pump is isolated, do not charge the system yet.
Example
Suppose a system reaches 450 microns after 35 minutes. You close the valves and isolate the pump. After 10 minutes, the reading rises to 480 microns and stays close to that level.
That result is generally more encouraging than a system that reaches 300 microns but rises to 2,000 microns within a few minutes.
The exact acceptable rise depends on the vehicle maker’s instructions, the test setup, and the size of the system. A fast or steady rise needs investigation.

How to Pull a Vacuum on a Car AC System
Only use this procedure if you have the correct equipment and know whether the refrigerant has been recovered. Do not release refrigerant into the atmosphere.
Equipment you need
You will normally need:
- An AC vacuum pump
- A manifold gauge set or approved service equipment
- A micron gauge
- Correct low- and high-side service couplers
- Refrigerant recovery equipment
- New O-rings or seals when required
- The vehicle service information
- Safety glasses and gloves
A recovery machine is required before opening a charged system. In the United States, the Environmental Protection Agency regulates refrigerant handling for motor vehicle air conditioning. Section 609 certification rules apply to technicians who service these systems for payment.
Step 1: Confirm the repair is complete
Check that:
- All fittings are tight
- O-rings are correct and lightly coated with the specified AC oil
- Service port caps are present and in good condition
- The compressor is installed correctly
- The receiver-drier or accumulator was replaced when required
- The correct refrigerant and oil type are listed for the vehicle
Do not add oil by guesswork. Too much oil can reduce cooling and may damage the compressor.
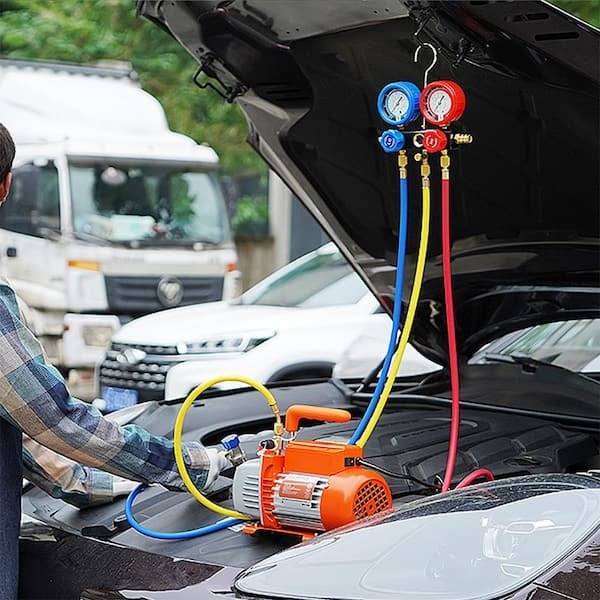
Step 2: Connect the tools correctly
Connect the blue hose to the low-side service port and the red hose to the high-side port. Connect the center hose to the vacuum pump.
Place the micron gauge as close to the vehicle system as practical. A gauge mounted near the pump may give a misleading reading because the hoses and manifold can restrict flow.
Keep the manifold valves closed at first. Double-check the hose connections before starting the pump.
Step 3: Start the vacuum pump
Open the needed manifold valves and start the pump. Watch the vacuum reading.
The reading may drop quickly at first. It may then improve more slowly as moisture leaves the system. This slower stage is normal.
If the reading stops improving, check for:
- A loose hose connection
- A leaking service coupler
- A damaged manifold valve
- A pump with worn oil
- A restricted hose
- A large system leak
Step 4: Continue until the vacuum is deep and stable
Run the pump for at least 30 minutes on a normal repair. Use more time when the system was open for a long period or when the vacuum improves slowly.
For better results, change the pump oil if it looks cloudy or contaminated. Pump oil filled with moisture can reduce the pump’s ability to reach a deep vacuum.
Step 5: Isolate the system and perform a hold test
Close the manifold valves or isolation valves. Then turn off the pump.
Watch the micron gauge for several minutes. A small change may occur as temperatures equalize. A rapid or continuing rise suggests a problem.
Possible causes include:
- A real leak in the vehicle system
- A leak in the hoses, manifold, or couplers
- Moisture still boiling inside the system
- A faulty valve or micron gauge
- A restriction between the gauge and the system
Do not assume every vacuum rise means a vehicle leak. First check the test equipment.
Step 6: Charge by weight
Once the system passes the vacuum test, add the specified refrigerant amount by weight. Use the label under the hood or the vehicle service information.
Do not charge by pressure alone. Pressure changes with outdoor temperature, engine speed, airflow, and refrigerant type. The correct charge is normally listed in ounces or grams.

How to Tell Whether the Vacuum Test Passed
A good vacuum test has three signs:
- The system reaches a deep vacuum.
- The reading stops improving only after moisture has been removed.
- The reading remains reasonably stable when the pump is isolated.
A vacuum that holds does not prove that the AC system will work perfectly. It does not confirm the correct refrigerant charge, compressor performance, airflow, blend-door operation, or electrical control.
It does show that the system is not showing a major leak under vacuum and that the evacuation process has likely removed much of the air and moisture.
Vacuum test results and likely meanings
| Result | Likely meaning | Recommended action |
|---|---|---|
| Vacuum reaches 500 microns and stays near that level | Good evacuation result | Charge by the specified weight |
| Vacuum stops around 2,000–5,000 microns | Leak, poor pump, restriction, or moisture | Check tools and connections |
| Vacuum drops well but rises quickly when isolated | Leak or tool leak | Inspect the vehicle and test setup |
| Vacuum improves very slowly | Moisture, cold conditions, weak pump, or restriction | Continue testing and check pump oil |
| Vacuum reaches a good level but rises slowly | Small leak or remaining moisture | Repeat the test after checking connections |
| Gauge shows vacuum but micron gauge does not | Gauge or connection issue | Verify gauge placement and calibration |
A rise caused by moisture
Water vapor can continue to boil after the pump is shut off. This may cause a gradual pressure rise rather than a sharp jump.
If the reading rises slowly and then levels out, run the pump again for another 20 to 30 minutes. If the reading rises quickly and keeps climbing, look for a leak.
This distinction is not perfect. A technician may need a pressure test, leak detector, ultraviolet dye, or nitrogen test to locate the cause.

What Changes the Required Vacuum Time?
The system’s condition matters more than the clock.
The system was open for only a short time
If you replaced a fitting and capped the lines quickly, 30 minutes may be enough. You still need a vacuum-hold test before charging.
The system was open for days
A system left open can absorb moisture through the desiccant and exposed components. Run the pump for at least 45 to 60 minutes, then test the vacuum.
If the receiver-drier or accumulator was exposed for a long time, replacement may be necessary. Follow the vehicle service manual.
The system has a major leak
A vacuum pump may pull down a system with a small leak, but the vacuum may not hold. Find and repair the leak before charging.
Common leak points include:
- Compressor shaft seals
- Hose crimps
- O-rings
- Condenser damage
- Evaporator cores
- Service ports
- Pressure switches
- Receiver-drier connections
The weather is cold
Cold conditions can slow moisture removal. They can also change pressure readings and make leak diagnosis harder.
If possible, perform the work in a warm, dry area. Do not heat refrigerant cylinders with an open flame or unsafe heat source.
The pump is too small or poorly maintained
A small pump may still work, but evacuation can take longer. Dirty or water-filled pump oil can also limit performance.
Use the pump maker’s recommended oil and service schedule. Replace oil when it becomes cloudy, dark, or contaminated.

Common Mistakes When Evacuating Car AC
Charging after a timed vacuum only
Running a pump for 30 minutes does not prove that the system is leak-free. Always isolate the system and observe the vacuum.
Using only the manifold gauge
Manifold gauges are useful for service work, but they may not measure a deep vacuum accurately. A micron gauge gives a better view of the evacuation process.
Leaving the system open during the repair
Open hoses allow humid air to enter. Keep components capped until you are ready to connect them.
Reusing damaged O-rings
An old O-ring may leak even if the fitting feels tight. Replace seals with the correct material and size for the refrigerant and oil used.
Charging by pressure instead of weight
Pressure is not a reliable way to measure the amount of refrigerant in the system. Use a scale and the vehicle’s listed charge.
Pulling vacuum through restricted fittings
Old hoses, clogged couplers, and closed valves can make the pump appear weak. Check that the service ports open fully and that the hoses are suitable for deep vacuum.
Venting refrigerant
Do not vent refrigerant to the air. Recover it with approved equipment. Refrigerant can cause frostbite, eye injury, and breathing hazards in poorly ventilated areas.

When to Stop and Get Professional Help
Stop the job if the refrigerant type is unknown, the system is still charged, or you do not have recovery equipment.
Professional service is also the safer choice when:
- The compressor has failed internally
- Metal debris may be in the system
- The system contains a refrigerant you cannot identify
- The vehicle uses a high-voltage electric compressor
- The vacuum will not hold
- You suspect an evaporator leak
- You are unsure how much oil to add
- The system uses special hybrid or electric vehicle procedures
Hybrid and electric vehicles may use electrically insulated compressor oil. The wrong oil can create a serious high-voltage safety risk.

Key Takeaways
- Pull vacuum for about 30 minutes on a typical car AC repair.
- Use 45 to 60 minutes or more when the system was open for a long time or contains moisture.
- A 500-micron target is more useful than time alone.
- Perform a vacuum-hold test before charging.
- Charge the system by the manufacturer’s specified weight.
- Repair leaks before adding refrigerant.
- Never vent refrigerant into the atmosphere.
FAQs
Can I pull a vacuum for only 10 minutes?
You can, but 10 minutes may not remove enough moisture from a car AC system. It may be suitable only for a limited situation specified by the vehicle maker. For most repairs, use at least 30 minutes and perform a hold test.
How long should a car AC system hold vacuum?
There is no single time that applies to every vehicle. After isolation, the reading should remain stable with no rapid rise. Follow the service information for the vehicle and test setup.
Does pulling a vacuum remove refrigerant?
No. A recovery machine removes and stores refrigerant. A vacuum pump removes air and moisture after recovery.
Can I charge the AC if the vacuum rises?
Do not charge it until you know why the vacuum rises. Check the hoses, manifold, couplers, and micron gauge first. If the tools are sound, inspect the vehicle for a leak or remaining moisture.
Do I need a micron gauge?
A micron gauge is not always required for basic service, but it gives much better information than a standard manifold gauge. It helps confirm whether the system reached a deep vacuum and whether the vacuum holds.
Should I replace the receiver-drier after pulling vacuum?
Pulling vacuum does not replace a receiver-drier or accumulator. Replace that part when the manufacturer requires it, when the system was open for an extended time, or when the desiccant may be saturated.
Final Answer
For most U.S. car AC repairs, pull vacuum for 30 to 45 minutes, then isolate the system and check whether the vacuum holds. Use 45 to 60 minutes or longer after major repairs or long exposure to humid air.
The best result is not simply “30 minutes on the clock.” It is a deep, stable vacuum, a successful hold test, and a refrigerant charge measured by weight.
Sources and further reading
- U.S. Environmental Protection Agency: Motor Vehicle Air Conditioning
- U.S. EPA Section 609 Technician Certification
- The vehicle manufacturer’s official service manual and under-hood refrigerant label
- The vacuum pump, manifold, micron gauge, and refrigerant equipment manufacturer’s instructions


One Comment