
Vacuuming an automotive air conditioning system removes air and moisture before you recharge it. In the United States, this step is needed after opening the AC system for a repair, replacing a part, or finding a refrigerant leak.
You need an AC manifold gauge set, a vacuum pump, the correct hose fittings, and a known refrigerant charge for the vehicle. First, recover any refrigerant with approved recovery equipment. Never vent refrigerant into the air. Then connect the gauges, pull a deep vacuum, test whether the vacuum holds, and recharge the system by weight.
The process is simple in principle, but small errors can lead to poor cooling, compressor damage, or an unsafe refrigerant release.
What Vacuuming an Auto AC System Does
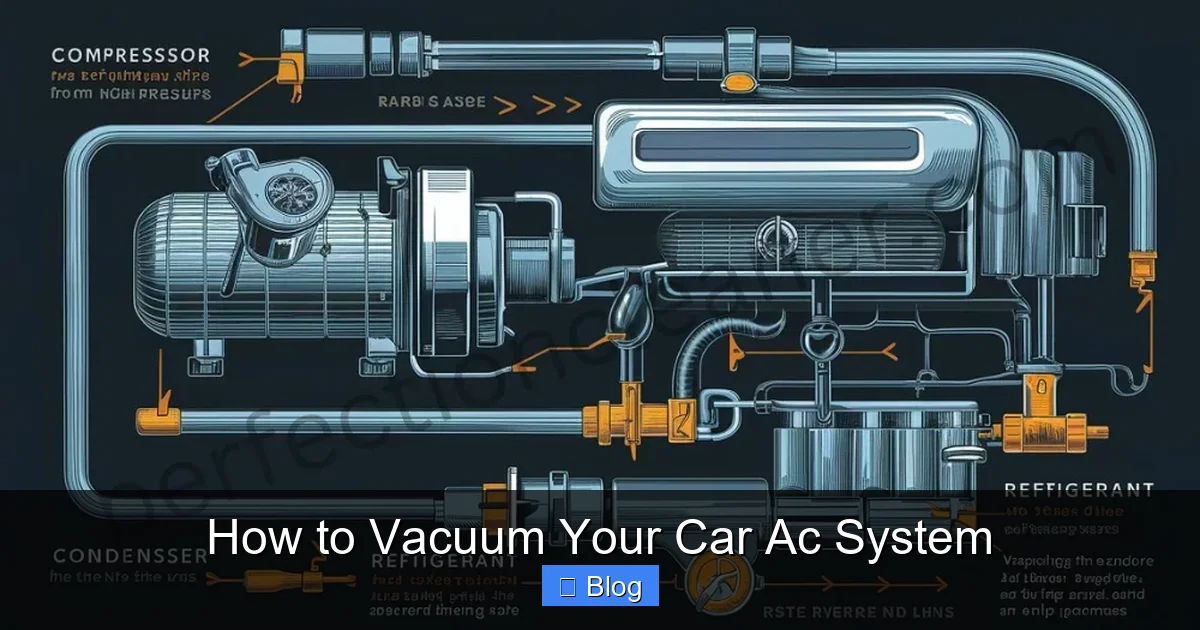
Vacuuming removes air, water vapor, and other gases from the sealed AC circuit. A vacuum pump lowers the pressure inside the system so moisture can boil off and leave through the pump.
Moisture is a serious problem. It can freeze near the expansion device, react with refrigerant oil, and contribute to corrosion. Air also raises system pressure and can make the AC run hot.
Vacuuming does not:
- Repair a refrigerant leak
- Remove all metal debris
- Replace refrigerant
- Recover refrigerant from a charged system
- Prove that the system has no small leak
- Clean contaminated oil from the system
A vacuum test is one part of AC service. It is not a complete diagnosis.

Tools and Supplies You Need
Gather the right tools before you open the system. The required equipment may vary by vehicle and refrigerant type.
You will usually need:
- AC manifold gauge set or an approved AC service machine
- Vacuum pump rated for automotive AC work
- R134a or R1234yf service couplers, as required
- Vacuum-rated hoses
- Refrigerant recovery equipment
- Refrigerant scale
- The correct refrigerant
- New service port caps, if the old caps are damaged
- Safety glasses and refrigerant-safe gloves
- Vehicle service information
- Optional micron gauge
- Optional electronic leak detector or approved leak-test solution
Most US passenger vehicles use R134a or R1234yf. These refrigerants use different fittings and service procedures. Do not mix them.
R1234yf systems may also require special equipment because the refrigerant is mildly flammable. Check that the recovery machine, manifold set, and hoses are rated for the refrigerant in the vehicle.
Check the Vehicle Service Information
Find these details before starting:
- Refrigerant type
- Refrigerant charge amount
- Oil type
- Oil quantity
- Compressor oil procedure
- Vacuum or leak-test instructions
- Service port locations
- Required replacement parts
- Special high-voltage or hybrid vehicle procedures
The refrigerant charge is often listed on a label under the hood. The exact charge may also be listed in the factory service manual.
Do not estimate the final charge by pressure alone. The correct charge is usually measured by weight.
Safety Rules Before You Start
Use the following safety rules every time you service an AC system.
Recover Refrigerant First
If refrigerant remains in the system, recover it with approved equipment before disconnecting a hose or part. US Environmental Protection Agency rules prohibit intentional venting of refrigerant during vehicle service.
A vacuum pump is not a recovery machine. Do not connect a vacuum pump to a charged system and use it to remove refrigerant.
Protect Your Eyes and Skin
Liquid refrigerant can cause frostbite. Wear safety glasses and gloves. Work in a well-ventilated area, away from flames and hot surfaces.
Do not place your face near a service port or disconnected hose.
Use the Correct refrigerant
Never use a refrigerant can that does not match the vehicle label. Do not mix R134a, R1234yf, propane-based products, or unknown refrigerants.
A system with the wrong refrigerant may cool poorly and can damage service equipment. It may also create a fire or pressure hazard.
Take Extra Care With Hybrid and Electric Vehicles
Some hybrid and electric vehicles use high-voltage electric compressors. These systems may require a specific non-conductive oil, often called hybrid compressor oil.
Using the wrong oil can reduce electrical insulation and create a shock hazard. Follow the vehicle maker’s procedure. If the procedure is unclear, use a qualified AC technician.
How to Vacuum an Auto AC System Step by Step
The basic sequence is: recover, repair, connect, evacuate, test, and recharge. Do not skip the leak check after pulling a vacuum.
1. Confirm the System Is Ready
Park the vehicle on a level surface. Turn the engine off and let hot parts cool.
Confirm that:
- The correct replacement part is installed
- O-rings were replaced where required
- O-rings were coated with the correct AC oil
- Hose fittings are tight
- Service ports are accessible
- The system has already been recovered
- The vacuum pump has clean oil
Do not open the system only to “see if it needs a vacuum.” Opening the system allows moisture to enter.
2. Inspect the Vacuum Pump
Check the pump oil level and condition. Old, cloudy, or contaminated oil can reduce pump performance.
Use the oil specified for the vacuum pump. Do not fill the pump with PAG, POE, engine oil, or refrigerant oil unless the pump maker specifically allows it.
Place the pump on a stable surface. Keep the pump oil level within the marked range.
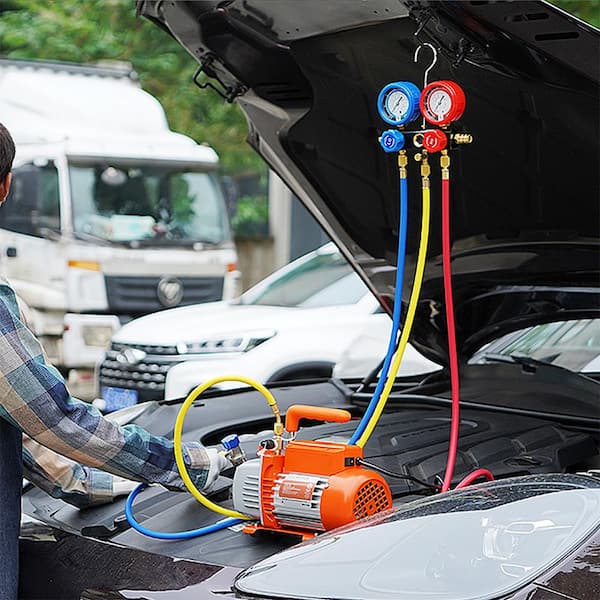
3. Connect the Manifold Gauge Set
With the manifold valves closed:
- Connect the blue hose to the low-side service port.
- Connect the red hose to the high-side service port.
- Connect the center hose to the vacuum pump.
- Make sure each coupler is fully seated.
- Check that the hose gaskets are in good condition.
The low-side port is usually larger than the high-side port. The fittings are designed to reduce connection errors, but always confirm the port labels.
Do not open the manifold valves yet.
4. Reduce Air in the Service Hose
Air trapped in the center hose can enter the AC system. Many technicians briefly crack open the center hose connection at the pump, start the pump, and allow the pump to clear the hose before tightening the connection.
Follow the gauge-set instructions for this step. Keep the process brief and controlled. Do not loosen a hose connected to a pressurized refrigerant system.
Some service machines purge hoses automatically.
5. Start the Vacuum Pump
Open both the low-side and high-side manifold valves. Then start the vacuum pump.
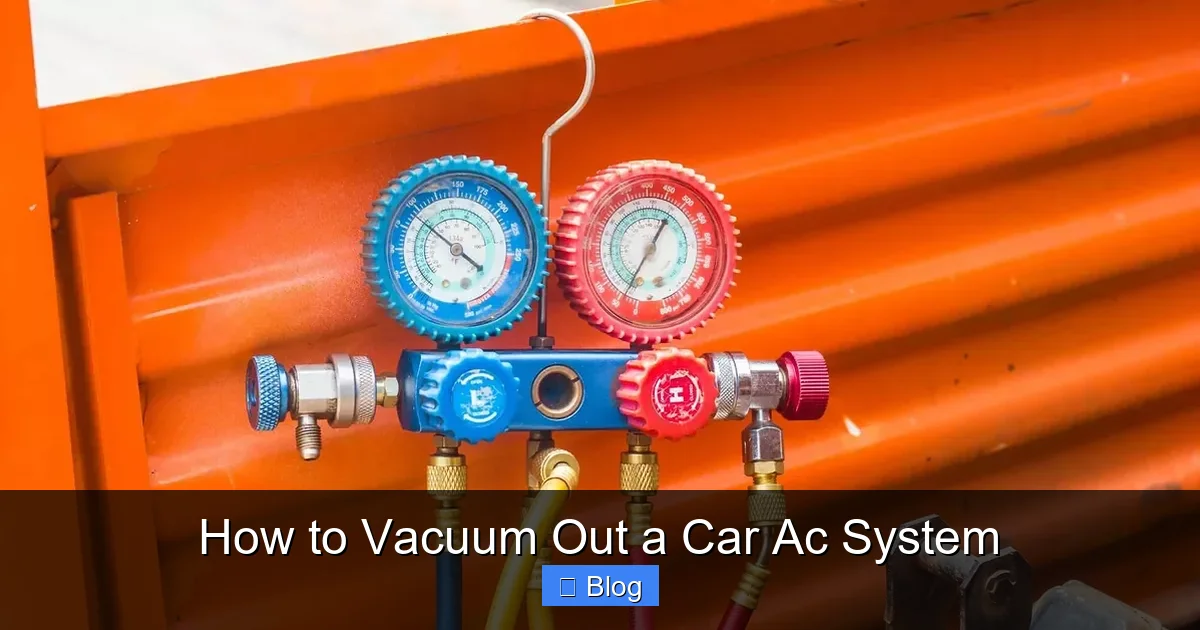
The gauges should move toward vacuum. On a standard gauge, this may appear near 29 inches of mercury, or inHg, at sea level. The exact reading changes with altitude, temperature, pump condition, and gauge accuracy.
A standard manifold gauge is useful for a basic check, but it is not a precise vacuum measurement tool. A micron gauge gives a better reading.
6. Pull the Vacuum for the Required Time
Let the pump run long enough to remove moisture from the system. A common automotive service practice is about 30 to 45 minutes after the gauge reaches its lowest stable reading.
The correct time depends on:
- System size
- How long the system was open
- Humidity
- Hose length
- Pump capacity
- Pump oil condition
- Leak size
- Vehicle service instructions
A system that was open overnight in humid weather may need more evacuation time than one opened briefly in a dry shop.
Do not judge success by time alone. The system must reach a deep vacuum and hold it after the pump is isolated.
7. Isolate the System and Perform a Vacuum Hold Test
Close both manifold valves. Turn off the vacuum pump.
Watch the gauge for several minutes. The vacuum should remain stable or change very slowly.
A rapid loss of vacuum usually points to:
- A loose hose connection
- A damaged hose gasket
- A leaking service coupler
- An open valve
- A missing service port core
- A leaking O-ring
- A leaking component
- Moisture boiling out of the oil
A micron gauge makes this test more useful. Many professional shops use about 500 microns or lower as a common evacuation target, then isolate the system and monitor the rise. The exact pass limit and test time should come from the vehicle or equipment procedure.
A rising vacuum does not always prove a refrigerant leak. It may indicate trapped moisture or a leak in the test setup.
8. Find and Repair the Cause if the Vacuum Does Not Hold
If the vacuum rises quickly, do not recharge the system yet.
Start with the easy checks:
- Confirm that the manifold valves are closed.
- Tighten hose connections by hand, then as directed by the equipment maker.
- Inspect hose seals and couplers.
- Check the service port cores.
- Confirm that caps and fittings are installed correctly.
- Isolate the manifold and test the hoses separately if possible.
If the equipment holds vacuum but the vehicle system does not, inspect the vehicle for leaks. Use an approved electronic detector, ultraviolet dye when suitable, or another method recommended by the manufacturer.
Never add refrigerant to a system with a known leak unless the refrigerant is being used briefly for an approved diagnostic procedure and the refrigerant is recovered afterward.
9. Close the Valves Before Disconnecting the Pump
After the system passes the vacuum hold test, close the manifold valves. Then disconnect the center hose from the vacuum pump.
Do not open the manifold valves to the atmosphere. The system should remain isolated and under vacuum until you begin charging.
10. Recharge With the Correct Amount
Recharge the AC system with the correct refrigerant and the exact specified mass. Use a refrigerant scale.
The normal process is:
- Connect the refrigerant cylinder to the center hose.
- Purge air from the charging hose according to the equipment instructions.
- Add refrigerant using the correct service method.
- Stop at the specified charge weight.
- Close the valves.
- Remove the couplers carefully.
- Install service port caps.
The best charging method depends on the refrigerant, equipment, and vehicle procedure. Some systems allow an initial liquid charge with the engine off. Others require vapor charging through the low side with the compressor running. Follow the equipment and vehicle instructions.
Do not pour liquid refrigerant into the low-side port while the compressor is running. Liquid entering the compressor can cause serious damage.
11. Test the AC System
After charging, start the engine and set the climate controls as directed by the service information. Common test settings include:
- AC on
- Recirculation on
- Blower at high speed
- Doors or windows open
- Engine at the specified test speed
Check:
- Center vent temperature
- High-side and low-side pressures
- Compressor operation
- Condenser fan operation
- Unusual noise
- Leaks at repaired areas
- Correct clutch or compressor control
- Proper air flow
Pressure readings depend on outdoor temperature, humidity, engine speed, airflow, refrigerant type, and system design. Do not diagnose charge level from one pressure reading alone.
How Long Should You Vacuum an Auto AC System?
For many vehicle systems, 30 to 45 minutes is a practical starting point after the pump reaches a stable deep vacuum. This is not a universal rule.
A longer evacuation may be needed when:
- The system was open for many hours
- The vehicle was exposed to rain or high humidity
- A major component was replaced
- The oil looks contaminated
- The vacuum rises during the hold test
- The pump or hoses are long or small
- The vacuum gauge reading is poor
A short vacuum may remove some air but leave moisture behind. A long vacuum cannot compensate for a large leak or a weak pump.
The best sign of a ready system is a deep, stable vacuum that holds after the pump is isolated.

What Vacuum Reading Should an Auto AC System Reach?
A standard manifold gauge may show close to 29 inHg at sea level when the system is under a deep vacuum. That reading can be lower at high elevation.
For better accuracy, use a micron gauge. A common professional target is 500 microns or below, followed by a vacuum hold test. Treat this as a common service benchmark, not a replacement for the vehicle maker’s instructions.
The difference matters because inches of mercury measure a broad range poorly near a deep vacuum. A system can appear to show a strong vacuum on a manifold gauge while still holding too much moisture or leaking through a small opening.
Place the micron gauge on the system side of the hoses when possible. A gauge mounted only at the pump may show the pump’s vacuum rather than the vacuum at the vehicle.

Troubleshooting: Vacuum Problems and Likely Causes
Use the symptom to guide the next check.
| Symptom | Possible cause | Useful next check |
|---|---|---|
| Gauge will not enter vacuum | Closed valve, blocked hose, bad coupler, failed pump | Check valve position, hose path, and pump oil |
| Vacuum drops at once | Large leak or disconnected hose | Inspect fittings and major components |
| Vacuum rises slowly | Small leak or moisture | Check connections, run a longer evacuation, then leak-test |
| Vacuum rises quickly after isolation | Leak in hoses, couplers, or vehicle | Isolate the manifold and test sections separately |
| Gauge reaches vacuum but cooling is poor | Wrong charge, airflow problem, control fault, or compressor issue | Check charge by weight, fans, pressures, and controls |
| Vacuum pump sounds rough | Low or contaminated pump oil | Check oil level and replace it if required |
| High-side pressure becomes excessive | Overcharge, poor condenser airflow, air in system, or restriction | Stop testing and diagnose before adding refrigerant |
| Compressor will not run | Low-pressure control, electrical fault, no charge, or compressor fault | Check system controls and follow the vehicle diagnostic path |
Do not keep adding refrigerant because the AC is not cold. Overcharging can raise pressure and damage parts.

Common Mistakes to Avoid
Using a Vacuum Pump to Recover Refrigerant
A vacuum pump is designed to remove air and moisture after recovery. It is not designed to pump refrigerant into the atmosphere.
Skipping the Leak Repair
A system may hold a vacuum for a short time and still leak refrigerant under pressure. Vacuum testing is useful, but it is not a complete pressure leak test.
Charging by Pressure Only
Pressure changes with temperature and airflow. Charge the system by the specified weight whenever possible.
Leaving the System Open
Every minute that an open system sits exposed, more humid air can enter. Cap or seal open lines during repairs.
Using the Wrong Oil
Too much oil can reduce cooling and raise pressure. The wrong oil can damage the compressor or, in some hybrid systems, reduce electrical insulation.
Leaving Service Caps Off
Service port caps help seal the ports. Replace damaged caps and tighten them as specified.
Mixing Refrigerants
Mixed refrigerants can make recovery, recycling, diagnosis, and repair difficult. If the refrigerant is unknown, have the system identified before service.
Relying Only on a Manifold Gauge
A manifold gauge can show pressure, but it cannot measure vacuum as accurately as a micron gauge. It also cannot identify the cause of every AC fault.

When to Use a Professional AC Technician
Professional service is the safer choice when:
- The refrigerant type is unknown
- The system still contains refrigerant
- A large leak is present
- The system contains debris or black oil
- The vehicle is a hybrid or electric model
- R1234yf equipment is unavailable
- The compressor has failed
- A high-voltage compressor is involved
- The system will not hold vacuum
- High-side pressure becomes abnormal
- You do not have a refrigerant scale or recovery machine
AC refrigerant is regulated in the United States. Section 609 of the Clean Air Act covers motor vehicle air conditioning service. The EPA provides current requirements through its Motor Vehicle Air Conditioning page.
For vehicle-specific procedures, use the factory service manual or a trusted repair database. Equipment instructions from the vacuum pump and manifold manufacturers also matter because hose purging and charging methods differ.

Frequently Asked Questions
Can I vacuum an AC system without removing the refrigerant?
No. If refrigerant is present, recover it with approved equipment first. Do not use a vacuum pump to vent or recover refrigerant.
Can vacuuming fix an AC leak?
No. Vacuuming may help reveal a leak, but it does not repair one. Replace the failed seal or part, then evacuate and test the system again.
How long should I leave the vacuum pump running?
A common starting point is 30 to 45 minutes after the system reaches a stable vacuum. The proper time depends on the system condition, humidity, pump, hoses, and service instructions.
Does a vacuum guarantee that the AC system will not leak?
No. A system can hold vacuum and still leak refrigerant under operating pressure. Use a suitable leak-test method after repairs and check the system again after charging.
Can I use a cheap manifold gauge set?
A basic set may work for simple service if its hoses, seals, couplers, and valves are in good condition. For accurate evacuation, add a micron gauge and use quality vacuum-rated hoses.
What should I do if the vacuum will not hold?
First check the gauge set, hoses, couplers, service port cores, and valve positions. If the equipment holds vacuum by itself but the vehicle does not, inspect the vehicle for a leak. Do not recharge until the cause is found.
Should I replace the receiver-drier or accumulator after opening the system?
Often, yes, especially if the system was open for a long time or the component is part of the repair procedure. The exact requirement depends on the vehicle maker and the repair performed.
Quick Checklist
Before starting:
- Confirm the refrigerant type.
- Find the correct charge weight.
- Recover refrigerant with approved equipment.
- Repair known leaks.
- Replace required O-rings and parts.
- Check compressor oil instructions.
- Inspect vacuum pump oil.
- Use the correct service couplers.
- Wear eye and skin protection.
During evacuation:
- Connect low, high, and center hoses correctly.
- Purge air from the service hose.
- Open both manifold valves.
- Pull a deep vacuum.
- Isolate the system.
- Confirm that the vacuum holds.
Before finishing:
- Charge by the specified weight.
- Do not mix refrigerants.
- Check for leaks.
- Test vent temperature and system pressures.
- Refit service port caps.
- Record the repair and refrigerant used.
Final Takeaway
To vacuum an auto AC system, recover the existing refrigerant, repair leaks, connect a suitable manifold and vacuum pump, evacuate the system until it reaches a deep stable vacuum, perform a hold test, and recharge with the exact specified refrigerant weight.
The most important steps are not the length of time the pump runs. They are using the correct equipment, keeping air and moisture out, confirming that the vacuum holds, and following the vehicle’s service information. If the system contains an unknown refrigerant, uses a high-voltage compressor, or will not hold vacuum, stop and use qualified AC service.

One Comment