Introduction
Vacuuming is one of the best ways to remove dust, crumbs, pet hair, and grit from hardwood floors in U.S. homes. The safest method is simple: use a vacuum’s bare-floor setting, turn off the rotating brush, and move the vacuum slowly without dragging rough parts across the finish.
Regular vacuuming also helps remove sand, road salt, and small stones that can scratch wood floors. The right tools and a gentle method matter more than high suction or expensive features.
This guide explains how to vacuum solid and engineered hardwood floors, which settings to use, how often to clean, and what to do when your vacuum leaves marks or fails to pick up debris.

What You Need Before You Start
You need a vacuum that can clean hard floors without using an aggressive rotating brush. A canister, stick, upright, or robot vacuum may work if its settings and attachments suit the floor.
Gather these items:
- A vacuum with a bare-floor or hard-floor mode
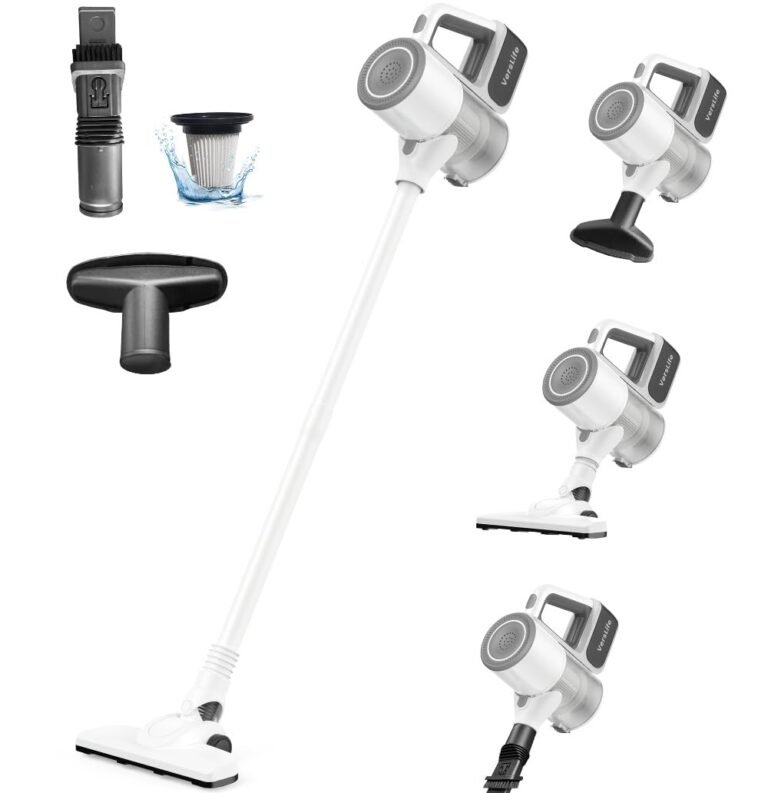
- A soft floorhead or soft-bristle attachment
- A crevice tool for edges and gaps
- A clean microfiber cloth
- A soft dust mop, if needed
- The hardwood floor care instructions from the floor or finish manufacturer
Check the vacuum before cleaning. Make sure the wheels are free of grit, the floorhead has no trapped stones, and the brush roll is clean. A small pebble caught in the head can act like sandpaper.
Solid Hardwood vs. Engineered Hardwood
Both solid and engineered hardwood floors can usually be vacuumed. The surface finish matters more than the construction type.
- Solid hardwood is made from one piece of wood through its thickness.
- Engineered hardwood has a wood surface layer over several bonded layers.
Both types can have oil, wax, polyurethane, aluminum oxide, or another finish. Always follow the floor maker’s instructions if they differ from general care advice.
Why Grit Causes Damage
Dust is usually soft, but grit is not. Sand and tiny stones can sit under vacuum wheels, shoes, or furniture legs. Repeated foot traffic then pushes those particles across the finish.
Vacuuming removes dry particles before they spread. It does not repair scratches that already exist, and it cannot replace the care instructions for a specific finish.

How to Vacuum Hardwood Floors Step by Step
Use a slow, dry, gentle process. Do not rush the vacuum across the floor, and do not use water during the vacuuming step.
1. Clear the Floor
Pick up toys, cords, clothing, and small objects. Move lightweight chairs if they block the vacuum head.
Do not pull heavy furniture across the floor. If you need to move it, lift it or use clean furniture sliders made for finished wood floors.
2. Check for Wet Spills
Remove wet spills before vacuuming. Most household vacuums are not designed to collect liquid unless the manual clearly says they are wet-dry models.
Blot the spill with a soft, dry, absorbent cloth. Do not soak the floor. Standing water can enter seams and may cause swelling, staining, or finish damage.
3. Select the Bare-Floor Setting
Set the vacuum to bare floor, hard floor, or wood floor mode. This setting often reduces or stops the rotating brush.
If the vacuum has no hard-floor setting, use a soft attachment and keep the rotating brush off. Do not assume that a vacuum labeled “multi-surface” is automatically safe for hardwood. Check its manual and inspect the floorhead.
4. Start at the Far Edge of the Room
Begin in the corner farthest from the doorway. Work toward the exit so you do not walk over areas you have already cleaned.
Use straight, overlapping passes. Move slowly enough for the vacuum to collect debris. A quick pass may leave grit behind, especially in floor grooves and along wall edges.
5. Vacuum With the Grain When Practical
If your floor has a clear wood-grain direction, move the floorhead with the grain when possible. This is not a strict rule for removing dust, but it can make fine debris and small surface marks less noticeable.
Keep the vacuum head flat. Do not tilt a powered floorhead so that a hard edge contacts the finish.
6. Clean Along Walls and in Corners
Use a soft crevice tool or a suitable edge attachment around baseboards, cabinet edges, and under furniture.
Do not press a hard plastic nozzle into the floor. Keep the nozzle slightly above the surface if the attachment has a rough edge.
7. Use a Soft Attachment for Loose Debris
For crumbs or hair, a soft floorhead is often enough. For delicate areas, use a soft-bristle tool rather than a bare plastic nozzle.
If you see a pebble, pick it up by hand instead of repeatedly pushing it with the vacuum head. This reduces the chance of dragging it across the finish.
8. Empty and Clean the Vacuum
Empty the dust cup or replace the bag when needed. A full container can reduce airflow and pickup.
Check the filter and floorhead according to the vacuum manual. Washable filters must be fully dry before reinstalling. Never place a damp filter back into a standard vacuum.
Signs You Vacuumed Correctly
After cleaning:
- The floor looks free of loose dust and grit.
- No new scuffs or dull tracks appear.
- Debris is not left along the room edges.
- The vacuum did not spit particles back onto the floor.
- The floor remains dry.
If the floor looks streaky, the problem may come from residue or an old cleaning product rather than poor vacuuming. Vacuuming removes dry debris; it does not remove sticky film.

Which Vacuum Settings Are Safe for Hardwood Floors?
The safest general setting is bare-floor mode with the rotating brush off. The exact names vary by vacuum brand and model.
| Vacuum feature | Hardwood-floor guidance |
|---|---|
| Bare-floor mode | Usually the best starting setting |
| Rotating brush or beater bar | Turn it off unless the floor maker permits it |
| Soft-bristle floorhead | Usually suitable when clean and free of grit |
| Strong suction | May be useful, but avoid a head that sticks or drags |
| Carpet height setting | Avoid if it causes rubbing or poor control |
| Hard plastic nozzle | Use carefully around edges, not pressed on the floor |
| Wet pickup mode | Use only with a vacuum designed and approved for liquids |
Why Turn Off the Beater Bar?
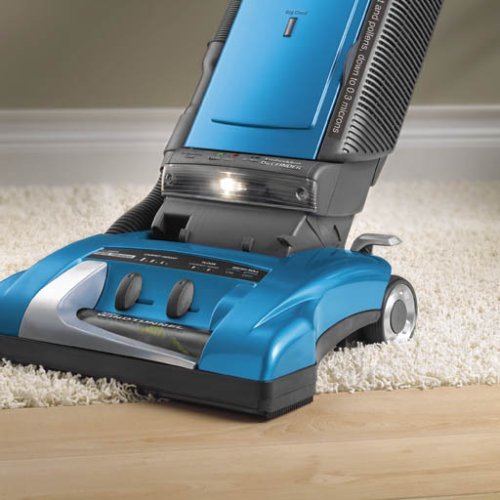
A beater bar, also called a brush roll, spins against the surface to loosen carpet fibers and lift dirt. On hardwood, it may scatter debris, create noise, or mark the finish if the brush is stiff, worn, dirty, or set too low.
Some modern vacuums use soft rollers designed for hard floors. These are not the same as a typical carpet brush. Use one only as directed by the vacuum and flooring manufacturer.
What About Robot Vacuums?
A robot vacuum can help with routine dry debris, but it still needs the right settings and maintenance.
Before using one on hardwood:
- Remove grit from its wheels and brush.
- Check whether its brush roll is approved for hard floors.
- Set no-go zones around wet areas or loose floor transitions.
- Keep cords, small objects, and pet accidents off the floor.
- Watch the first few cleaning cycles for scuffs or trapped debris.
A robot vacuum may miss corners, stair edges, and heavy debris. It works best as a maintenance tool, not as the only cleaning method in every home.
Is a Vacuum Better Than Sweeping?
A vacuum can remove fine dust, pet hair, and grit without sending as much debris into the air. A soft dust mop can also work well for light dust.
The best choice depends on the tool. A vacuum with hard wheels or a rough floorhead may be worse than a clean, soft dust mop. Inspect the tool, not just the cleaning method.

How Often Should You Vacuum Hardwood Floors?
Vacuum hardwood floors based on traffic, pets, children, and outdoor debris. There is no single schedule that fits every U.S. home.
A practical starting plan is:
- Low-traffic rooms: Once or twice a week
- Living rooms and hallways: Several times a week
- Homes with pets or young children: Daily or every other day in busy areas
- Entryways: As needed, especially during wet, snowy, or sandy weather
- Around litter boxes or food areas: Whenever loose debris appears
These are starting points, not fixed rules. If you can see grit, crumbs, hair, or salt, clean the area sooner.
Place mats at exterior doors to reduce the amount of outdoor dirt that reaches the floor. Keep mats clean, because a dirty mat can hold grit and spread it indoors.
Remove wet shoes and wipe up tracked moisture quickly. Moisture control is especially useful during winter in areas where road salt and snow are common.

Common Hardwood Vacuuming Mistakes
Avoiding a few common errors can protect the finish and improve cleaning results.
Using the Carpet Brush
A spinning carpet brush may be too harsh for some wood floors. Turn it off unless your flooring instructions specifically allow it.
Vacuuming Wet Debris With a Standard Vacuum
A regular household vacuum may suffer electrical or mechanical damage if it pulls in liquid. More importantly, spreading moisture across wood can increase the risk of swelling or staining.
Use a properly rated wet-dry vacuum only when its manual permits the task.
Dragging the Vacuum Sideways
Pulling the vacuum by its hose or cord can make the wheels twist and drag. Guide the vacuum by its handle and lift it over thresholds when needed.
Ignoring the Wheels
Wheels collect dust, hair, and grit. Turn the vacuum off, inspect the wheels, and clean them when needed. Replace damaged wheels or floorheads.
Using a Hard Nozzle on the Finish
A crevice tool can scratch if its edge is rough or pressed down. Keep hard plastic parts away from the main floor surface.
Applying Cleaner Before Vacuuming
Loose grit can move across a damp floor like fine sandpaper. Vacuum or dust-mop first. If the floor needs damp cleaning afterward, use only a product and amount approved for that floor.
Assuming More Suction Is Always Better
Very strong suction may make a floorhead difficult to move. It can also pull at loose mats or seals. Good contact, a clean filter, and slow passes usually matter more than maximum power.

Troubleshooting: When Vacuuming Does Not Work
Use the symptom to guide the next check. Start with simple, low-risk fixes.
| Symptom | Likely cause | What to check |
|---|---|---|
| Dust remains after vacuuming | Fast passes or blocked airflow | Slow down, empty the bin, clean the filter |
| Hair remains | Hair wrapped around the brush or poor head contact | Clean the brush and use a hard-floor attachment |
| Vacuum leaves scuffs | Brush roll, dirty wheels, or rough floorhead | Turn off the brush and inspect all contact points |
| Vacuum sticks to the floor | Suction is too high or the head is sealed too tightly | Lower suction or use the recommended setting |
| Debris sprays out | Full dust cup, blocked filter, or damaged seal | Empty the cup and inspect seals and filters |
| Edges stay dirty | Floorhead does not reach the wall | Use a soft crevice or edge tool |
| Floor looks dull | Residue, wear, or finish damage | Do not add more polish; check floor-care guidance |
| Vacuum makes a new noise | Blockage or damaged part | Stop the vacuum and inspect it before continuing |
If the Vacuum Leaves Marks
Stop using the vacuum until you find the cause. Check the brush roll, wheels, underside, and floorhead for trapped grit or exposed hard parts.
Clean a small test area by hand with a dry microfiber cloth. If the mark remains, it may be a scratch, finish change, or residue rather than a removable dirt mark.
For widespread damage or a finish that is peeling, whitening, or lifting, contact a hardwood flooring professional or the finish manufacturer. Do not sand or recoat a floor without confirming the floor type and finish requirements.
If the Floor Has Deep Gaps
Loose debris can collect between boards. Use a soft attachment and gentle suction. Do not force a narrow nozzle into gaps or scrape them with a tool.
Deep or widening gaps may relate to seasonal humidity changes, installation, or floor movement. Vacuuming will not correct the underlying issue.

Key Takeaways
- Use bare-floor mode whenever available.
- Turn off the rotating brush unless the floor maker approves it.
- Keep vacuum wheels, filters, and floorheads clean.
- Remove wet spills before using a standard vacuum.
- Move slowly and use overlapping passes.
- Clean entryways and busy areas more often.
- Use soft attachments around edges and corners.
- Stop if the vacuum leaves marks, sticks, or makes an unusual noise.
FAQs About Vacuuming Hardwood Floors
Can I use a regular vacuum on hardwood floors?
Yes, if the vacuum has a suitable bare-floor setting or soft attachment. Turn off the beater bar or rotating brush unless the floor and vacuum instructions say it is safe to use.
Should I vacuum or sweep hardwood floors first?
For most homes, vacuuming is a good first choice because it can collect fine dust, pet hair, and grit. A soft dust mop is also suitable for light dust. Avoid stiff brooms that may push grit across the finish.
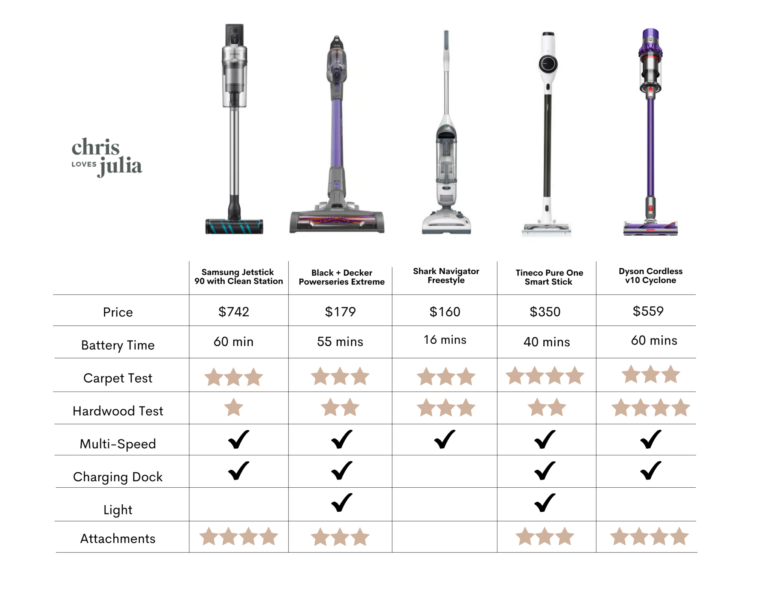
Can I use a Dyson or stick vacuum on hardwood floors?
Many stick vacuums include a hard-floor mode, but the correct setting depends on the model. Use the manufacturer’s hard-floor setting, inspect the roller for trapped grit, and stop if the head leaves marks.
Can vacuuming scratch hardwood floors?
The vacuum motor does not normally scratch the floor by itself. Scratches can result from grit caught under the head, rough wheels, a damaged brush roll, or a hard attachment pressed against the finish.
How do I vacuum hardwood floors with pet hair?
Use a hard-floor head with good airflow and clean the brush or roller often. Vacuum slowly, especially near baseboards and under furniture. A crevice tool can collect hair along edges.
Can I vacuum newly installed hardwood floors?
Follow the flooring installer’s or manufacturer’s instructions. New floors may have specific limits during installation, acclimation, or finish curing. Do not use water or cleaning chemicals unless the instructions allow them.
Should I vacuum before mopping hardwood floors?
Yes. Remove dry grit first, then use only the approved damp-cleaning method for the floor. Do not flood hardwood floors or leave standing water on them.

Conclusion
The safest way to vacuum hardwood floors is to use a clean, soft floorhead in bare-floor mode with the rotating brush turned off. Work slowly, keep grit away from the wheels and brush, and use a crevice tool for edges without pressing hard plastic onto the finish.
Start by checking your vacuum manual and the floor manufacturer’s care instructions. Then test the setting in a small area. If the floor stays clean, dry, and free of new marks, use the same method throughout the room.