Pulling a vacuum on a car’s air conditioning system removes air and moisture before you recharge it. In the United States, the safe method is to recover any refrigerant with approved equipment, connect a vacuum pump and manifold or AC service station, evacuate the system, and confirm that it holds vacuum before adding the correct refrigerant.
A vacuum does not repair a leak. It only removes air and water vapor and helps you check whether the sealed system may have a leak. Always follow the vehicle manufacturer’s service manual and current U.S. Environmental Protection Agency (EPA) rules for refrigerant handling.

What You Need Before Pulling an AC Vacuum
You need the right tools, a safe work area, and an empty AC system. Do not connect a vacuum pump to a system that still contains refrigerant.
Required tools
- AC vacuum pump
- Manifold gauge set or approved AC service machine
- Correct R-134a or R-1234yf service fittings
- Micron gauge, if available
- Refrigerant recovery machine and recovery cylinder
- Leak detector or approved leak-test solution
- Safety glasses and chemical-resistant gloves
- Vehicle service manual
- Correct refrigerant and oil specifications
A manifold gauge set shows system pressure, but its low-side gauge often cannot measure a deep vacuum accurately. A micron gauge gives a much better reading. For professional work, use a micron gauge at the system side of the manifold rather than relying only on the pump’s built-in gauge.
Confirm the refrigerant type
Most older vehicles in the United States use R-134a. Many newer vehicles use R-1234yf. These refrigerants require different fittings, labels, and service equipment.
Never mix refrigerants. Check the label under the hood, the vehicle service information, or the manufacturer’s specifications. Do not assume the refrigerant type from the vehicle’s model year alone.
Check the oil requirement
The AC compressor oil type and amount must match the vehicle specification. Common oils include PAG oils used with many R-134a systems and special oils used with some R-1234yf systems.
Adding too much oil can reduce cooling and harm compressor performance. Adding the wrong oil can damage system parts. If you replaced a component, add only the amount and type listed by the vehicle manufacturer.
Understand the legal boundary
In the United States, intentionally releasing refrigerant into the atmosphere is prohibited under Section 608 of the Clean Air Act. Refrigerant must be recovered with approved equipment before opening the system.
A person who services motor vehicle AC systems for payment may also need EPA Section 609 certification. Home repair work still requires safe refrigerant recovery and proper handling. If you do not have recovery equipment, use an automotive AC shop.
How to Pull a Vacuum on a Car AC System
The basic process is: recover the refrigerant, inspect and repair the system, connect the gauges, evacuate the system, run a decay test, and then recharge it by weight.
1. Park and prepare the vehicle
Park the vehicle on a level surface. Set the parking brake and turn the engine off.
Keep sparks, flames, and cigarettes away from refrigerant and refrigerant oil. Wear eye protection because liquid refrigerant can cause severe cold burns and eye injury.
Read the service manual before removing parts. Some vehicles have electric cooling fans that may start without warning, even when the engine is off.
2. Recover the refrigerant
Connect the recovery machine to the vehicle’s high- and low-side service ports. Use the correct fittings for the refrigerant in the vehicle.
Recover the refrigerant into an approved recovery cylinder. Do not vent it. After recovery, close the service valves and confirm that the system pressure has dropped to zero before disconnecting or opening a line.
A system that shows zero pressure may still contain trapped refrigerant in some components. Open lines carefully and follow the equipment instructions.
3. Find and repair leaks
Pulling a vacuum before fixing a leak wastes time. Inspect the common leak points first:
- Compressor shaft seal and case
- Condenser
- Evaporator
- Receiver-drier or accumulator
- Expansion valve or orifice tube connections
- Hose crimps
- Schrader service valves
- O-rings and line joints
Replace opened O-rings with the correct AC-rated parts. Lightly coat them with the specified compressor oil before installation, unless the service manual says otherwise.
If the system had a major leak or remained open for a long time, the receiver-drier or accumulator may need replacement. These parts absorb moisture and can become saturated.
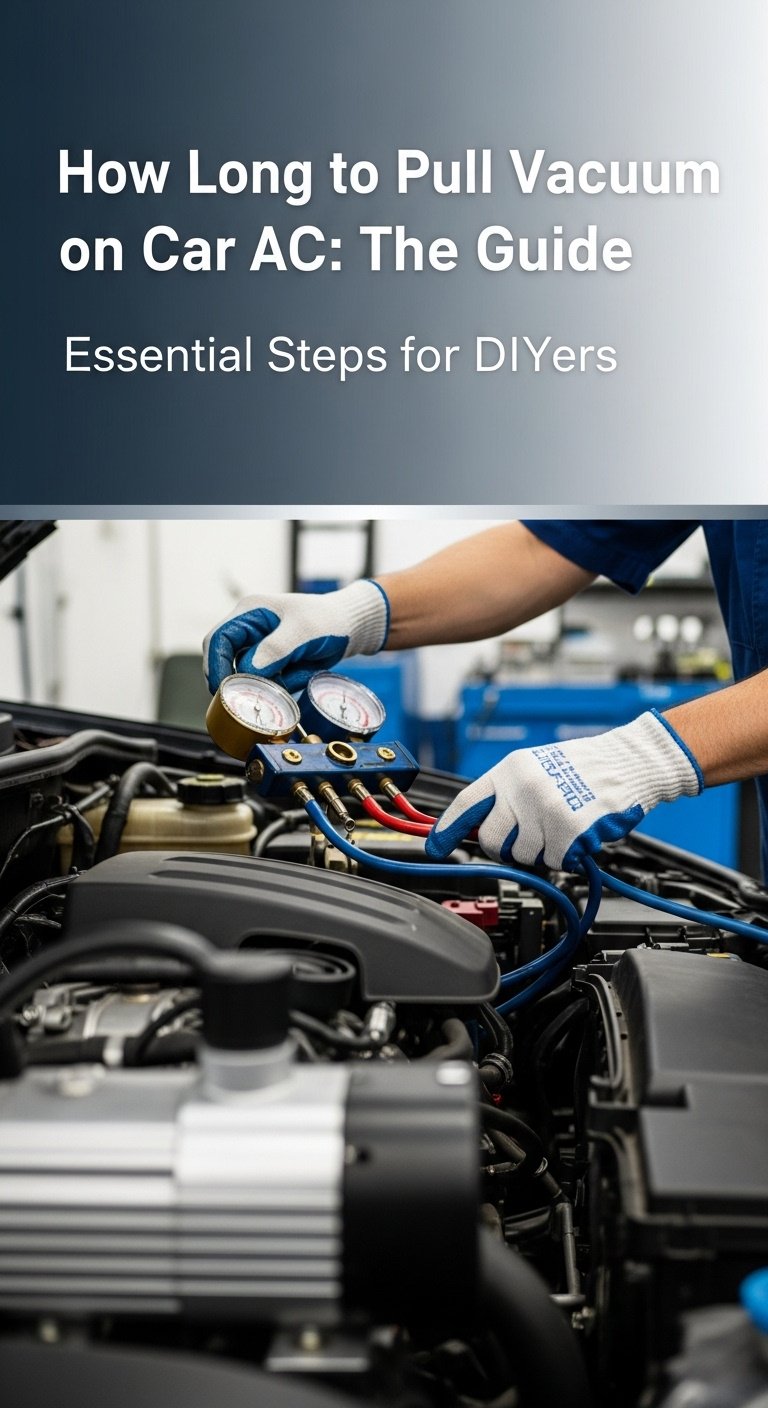
4. Connect the manifold and vacuum pump
With the system empty:
- Close both manifold valves.
- Connect the blue hose to the low-side service port.
- Connect the red hose to the high-side service port.
- Connect the center hose to the vacuum pump.
- Make sure all hose connections are tight.
- Remove the caps from the pump’s intake and oil-fill ports as required by the pump instructions.
- Open the manifold valves.
- Turn on the vacuum pump.
Some manifold sets have valves that can isolate the pump from the vehicle. Learn which valve controls which port before starting.
Keep the service couplers fully seated. A partly connected coupler can restrict flow or create a false leak.
5. Evacuate the system
Run the vacuum pump until the system reaches the vacuum level specified by the service manual or equipment maker. A common professional target is 500 microns or lower, but the correct target and hold time can vary by vehicle, system size, temperature, and repair procedure.
If you do not have a micron gauge, many technicians evacuate the system for about 30 minutes or longer. Time alone is not proof that the system is dry or leak-free. A micron gauge provides a more useful measurement.
A cold vehicle may take longer to evacuate because moisture boils off less easily at lower temperatures. If possible, work in a moderate-temperature, well-ventilated area. Do not heat the system with an open flame or unsafe heat source.
6. Isolate the system and perform a vacuum decay test
After the vacuum reaches the target:
- Close the manifold valves or isolation valve.
- Turn off the vacuum pump.
- Watch the micron gauge for at least 10 to 15 minutes.
- Record the starting and ending readings.
A stable reading suggests that the system is reasonably tight and that moisture removal is progressing well. A rising reading can indicate a leak, trapped moisture, a leaking manifold hose, a leaking service coupler, or a valve that is not fully closed.
A small change may occur as moisture continues to evaporate. A rapid rise toward atmospheric pressure usually points to a leak or an equipment problem.
7. Find the source if the vacuum does not hold
Do not add refrigerant to a system that fails the vacuum test.
Check these areas in order:
- Manifold hose connections
- Service couplers
- Valve cores
- Gauge manifold valves
- Hose seals
- Pump isolation valve
- Recently replaced parts
- Compressor, condenser, and evaporator connections
You can isolate sections of the equipment to determine whether the leak is in the vehicle or in the test setup. If the equipment holds vacuum but the vehicle does not, inspect the vehicle system.
A vacuum leak test is useful, but it is not perfect. Some leaks seal under vacuum and open under positive pressure. For difficult leaks, a shop may use dry nitrogen with an approved pressure test, electronic leak detection, ultraviolet dye, or another method allowed by the service information.
8. Close the system and recharge by weight
After the system passes the vacuum test, close the manifold valves before turning off or disconnecting the pump. Keep the system isolated from outside air.
Recharge the AC with the exact refrigerant amount listed on the under-hood label or in the service manual. Use a scale. Do not charge by pressure alone.
The correct charge may be listed in ounces or grams. Do not confuse refrigerant weight with compressor oil volume. They are separate specifications.
Once charged, reinstall the service-port caps. These caps help seal the ports and should not be treated as optional covers.

How Long Should You Pull a Vacuum on an Auto AC System?
A common starting point is 30 minutes, but the vacuum level and decay test matter more than the clock.
A small, dry system may evacuate quickly. A system that has been open for days, contains a new receiver-drier, or has high moisture may need more time. A large system or a system with long hoses can also take longer.
Use this practical guide:
| Situation | Practical approach |
|---|---|
| System opened briefly | Evacuate until the specified micron level is reached, then test |
| System open for hours or days | Use a longer evacuation and verify with a micron gauge |
| New compressor or drier installed | Follow the manufacturer’s oil and evacuation procedure |
| Vacuum rises quickly | Stop and find the leak or equipment fault |
| No micron gauge available | Follow the service manual’s time guidance, but treat the result as less certain |
The best test is not “the pump ran for 30 minutes.” The best test is “the system reached the required vacuum and held it after isolation.”
What Vacuum Level Should an Automotive AC System Reach?
Many automotive AC systems are evacuated to about 500 microns or lower before charging, but the vehicle or equipment instructions take priority.
A micron is a very small pressure unit. Standard manifold gauges are designed mainly for positive pressure and may show “vacuum” without showing whether the system has reached a useful deep vacuum.
A reading that reaches 500 microns and stays near that level during isolation is more meaningful than a gauge that simply moves to the bottom of its vacuum scale.
If the reading stops at a high level, rises slowly, or changes with temperature, the system may contain moisture. If it rises quickly, suspect a leak or a leaking test setup.
How to Tell Whether the Vacuum Test Passed
A system passes the basic test when it reaches the required vacuum and holds close to that level after the pump is isolated.
Use these signs:
- The vacuum reaches the specified target.
- The reading does not quickly climb toward zero.
- The manifold, couplers, and hoses are tight.
- No hissing sound comes from the system.
- The system accepts the specified refrigerant charge.
- The AC operates normally after charging.
A vacuum test cannot prove that every leak is sealed under all operating conditions. The system may pass a vacuum test but still leak when refrigerant pressure rises during operation. If the charge disappears later, perform a pressure-side leak test.
What to Do When the AC System Will Not Pull a Vacuum
When a vacuum pump cannot reach a deep vacuum, check the setup before blaming the vehicle.
Check the pump
- Confirm that the pump has clean oil at the correct level.
- Replace cloudy or contaminated pump oil.
- Make sure the pump intake is open.
- Check the pump’s gasket and fittings.
- Verify that the pump is rated for the job.
- Inspect the pump for unusual noise or poor performance.
Contaminated pump oil can limit vacuum depth. Always use the oil type recommended for the pump.
Check the hoses and manifold
- Tighten all hose fittings.
- Inspect hose ends for damaged seals.
- Confirm that the center hose is connected to the pump.
- Make sure the manifold valves work correctly.
- Check that the service couplers are fully open.
- Test the manifold by pulling vacuum on the hoses alone.
A useful test is to connect the pump, manifold, and hoses without the vehicle. If the setup cannot reach a deep vacuum by itself, the vehicle may not be the problem.
Check the vehicle
If the equipment works correctly, inspect the vehicle for:
- Missing or damaged O-rings
- Loose line fittings
- Cracked hoses
- Leaking service valves
- Damaged condenser tubes
- Compressor seal leaks
- Incorrectly installed components
- An open line or missing cap
Do not keep running the pump for hours to overcome a known leak. Repair the leak first.

Can You Pull a Vacuum Without a Manifold Gauge Set?
You can use a dedicated evacuation tool or AC service station, but you still need a way to connect the pump to the vehicle and isolate the system for testing.
A basic vacuum pump connected directly to a service port may remove air, but it makes it harder to:
- Monitor both service ports
- Isolate the vehicle from the pump
- Perform a proper decay test
- Add refrigerant safely
- Identify a leaking hose or coupler
For simple service, a manifold gauge set can work. For accurate repair work, a micron gauge and a quality manifold or automated AC machine provide better control.
Do not use a household vacuum cleaner. It is not designed for refrigerant recovery and may create a fire, contamination, or equipment hazard.
Common Mistakes When Pulling a Vacuum on Car AC
Charging without evacuating
Air and moisture can reduce cooling, increase pressure, and contribute to corrosion or ice at the expansion device. Evacuate the system before charging.
Using pressure as the only charge guide
Low-side pressure changes with outdoor temperature, engine speed, airflow, and system load. Charge by the specified weight, not by a pressure number alone.
Skipping the leak repair
A vacuum can temporarily hide a problem. If the system loses charge, locate and repair the leak before recharging it.
Mixing refrigerants
R-134a and R-1234yf are not interchangeable. Mixed refrigerant can contaminate recovery equipment and make later service unsafe or expensive.
Leaving the system open
Open hoses allow humid air to enter. Cap lines and ports during repairs. Replace moisture-sensitive parts when the service manual calls for it.
Forgetting the service-port caps
The caps provide a secondary seal. Replace damaged or missing caps after service.
Adding too much compressor oil
Oil does not replace refrigerant. Use the correct oil quantity and account for oil already in replaced parts.
Running the compressor with an empty system
The compressor may rely on refrigerant movement to carry oil. Follow the manufacturer’s instructions and avoid running the compressor with an unknown or empty charge.
R-134a and R-1234yf: What Changes?
The vacuum process is broadly similar, but the service equipment and safety rules differ.
| Item | R-134a | R-1234yf |
|---|---|---|
| Common use | Many older U.S. vehicles | Many newer U.S. vehicles |
| Service fittings | Different from R-1234yf | Different from R-134a |
| Equipment | Must be rated for R-134a | Must be rated for R-1234yf |
| Refrigerant handling | Recover; do not vent | Recover; do not vent |
| Oil and parts | Use vehicle specification | Use vehicle specification |
| Main warning | Do not mix refrigerants | Mildly flammable; use approved equipment |
R-1234yf is classified as mildly flammable. Follow the vehicle and equipment safety instructions, keep ignition sources away, and use tools designed for that refrigerant.
When Should You Let a Professional Handle the Job?
Use a qualified automotive AC technician when:
- You do not have approved recovery equipment.
- The refrigerant type is unknown.
- The system uses R-1234yf and you lack compatible tools.
- The compressor has failed internally.
- The system contains metal debris.
- The evaporator must be removed.
- A leak cannot be located.
- You suspect a refrigerant mixture.
- The vehicle has high-voltage electric AC components.
- The repair requires manufacturer-specific calibration.
Hybrid and electric vehicles may use electrically driven compressors. These systems can require special oil and high-voltage safety procedures. Using the wrong oil can damage the compressor or create an electrical safety concern.
Key Takeaways
- Recover refrigerant before opening the AC system.
- Repair leaks before pulling a vacuum.
- Use refrigerant-specific fittings and equipment.
- Evacuate to the manufacturer’s target; about 500 microns is a common professional reference.
- Perform a vacuum decay test after isolation.
- Recharge by the specified weight, not pressure alone.
- Use the correct refrigerant, oil, and replacement parts.
- Stop and seek professional help when the system, refrigerant, or safety risk is unclear.
Frequently Asked Questions
Can I pull a vacuum on an AC system that still has refrigerant?
No. Recover the refrigerant first with approved recovery equipment. A vacuum pump is not a recovery machine, and using it on a charged system can release refrigerant and damage the pump.
How long should a car AC vacuum hold?
The exact test time depends on the vehicle and service procedure. A 10- to 15-minute isolation test is a common practical check, but a stable micron reading matters more than a fixed time. A fast rise indicates a leak or a problem with the test equipment.
Does pulling a vacuum remove moisture from the AC system?
Yes, evacuation lowers system pressure so moisture can boil and leave the system. It works best when the system is warm enough, the pump is in good condition, and the system is kept sealed during the test.
Can I recharge the AC immediately after pulling a vacuum?
Yes, if the system reaches the specified vacuum and passes the decay test. Keep the system isolated from outside air, then charge it with the correct refrigerant amount by weight.
Why does my AC lose vacuum after I turn off the pump?
The cause may be a vehicle leak, leaking manifold hose, loose coupler, damaged valve core, contaminated pump oil, or moisture still boiling out. Isolate the vehicle from the equipment to determine which part is causing the pressure rise.
Final Step
Use the vehicle’s service manual as the final authority for refrigerant type, charge weight, oil amount, vacuum target, and test procedure. If you cannot legally and safely recover the refrigerant, have an automotive AC shop evacuate, leak-test, and recharge the system.