
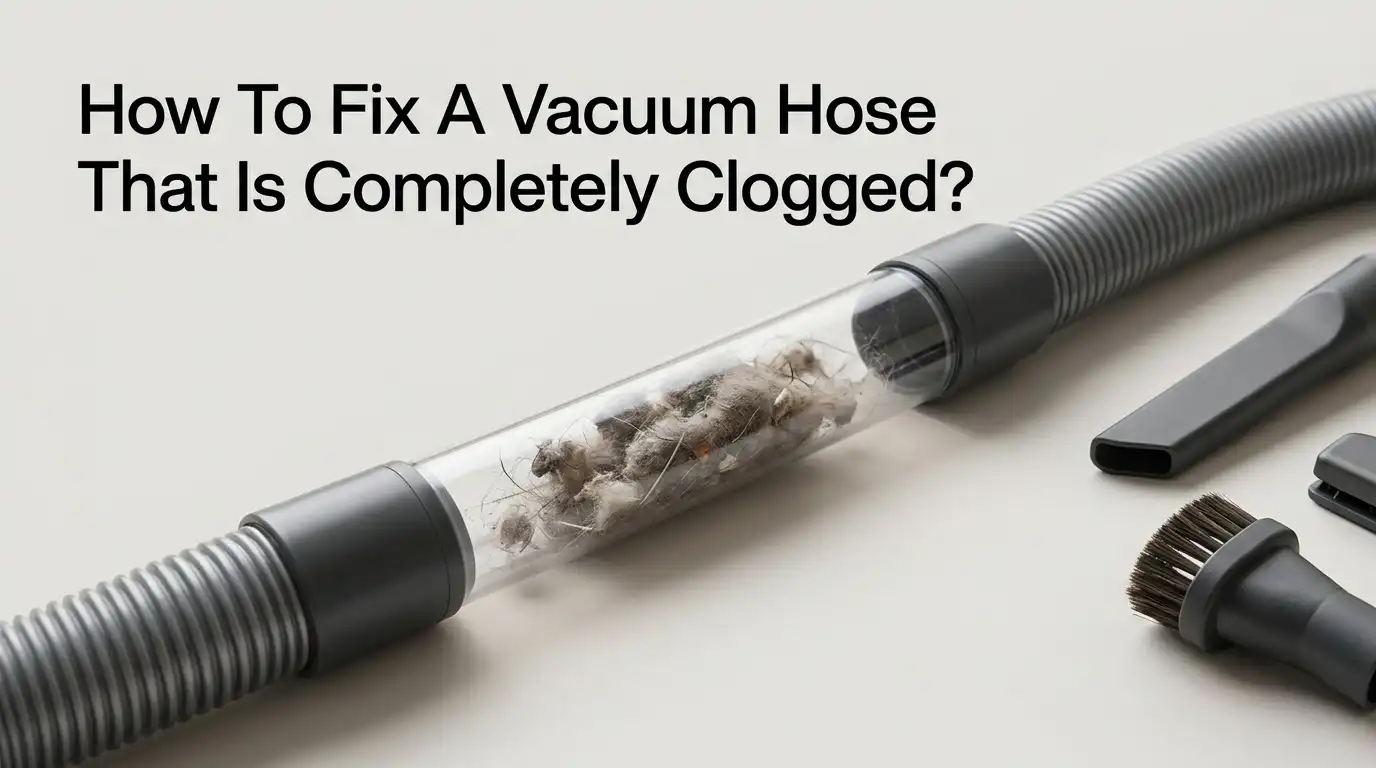
A clogged vacuum hose can cause weak suction, unusual noises, overheating, or debris that will not reach the dust cup or vacuum bag. In most U.S. household vacuums, you can clear the blockage safely by turning off and unplugging the machine, disconnecting the hose, checking both ends, and gently pushing or flushing out the obstruction with an appropriate tool.
Introduction
Vacuum hose clogs are common in American homes, especially when a vacuum accidentally picks up paper, socks, pet toys, hair ties, food wrappers, or large amounts of pet hair. A blockage may occur in the flexible hose, wand, floor nozzle, brush roll, or the narrow connector near the vacuum body.
The safest approach is to isolate the vacuum from power before investigating. Never reach into a connected vacuum, operate a household vacuum with liquid inside it, or use a sharp object that could puncture the hose. If the hose remains blocked after cleaning and the motor overheats or smells burnt, stop using the vacuum and consult the owner’s manual or a qualified repair professional.
Before You Clear the Vacuum Hose
Prepare the vacuum and work area before removing the blockage. You will usually need:
- The vacuum’s owner’s manual, if available
- A clean, well-lit work surface
- A flashlight
- A long, blunt, flexible object, such as a broom handle or plastic drain-cleaning tool
- A bucket or towel if rinsing is allowed
- Mild dish soap for washable hoses
- Replacement filters or seals if inspection shows they are damaged
Before beginning, identify the vacuum type:
| Vacuum type | Important precaution |
|---|---|
| Upright vacuum | Disconnect the hose from the floor head and vacuum body if the design allows it. |
| Canister vacuum | Check the hose, wand, floor head, and canister inlet separately. |
| Stick or cordless vacuum | Remove the battery or follow the manufacturer’s power-isolation instructions. |
| Wet/dry shop vacuum | Empty the tank first. Do not use water in dry-vacuum mode unless the manual permits it. |
| Central vacuum | Turn off the power unit and check the hose, inlet valve, and pipe system separately. |
A vacuum hose may look similar across brands, but attachment methods, washable components, and allowable cleaning methods vary. The manual takes priority over general instructions.
Why a clogged hose reduces suction
A vacuum motor creates airflow through the hose and cleaning head. When debris blocks that airflow, the motor may still run, but less air reaches the floor nozzle. The result can be:
- Weak or absent suction at the cleaning head
- A high-pitched or strained motor sound
- Debris left behind
- A vacuum that shuts off unexpectedly
- Dust or debris collecting in an unusual location
- Heat or a burning odor
A full dust cup, overfilled bag, dirty filter, jammed brush roll, or cracked hose can create similar symptoms. Do not assume the hose is the only possible cause.

How to Clear a Clogged Vacuum Hose: Step-by-Step
Follow these steps in order. They begin with the safest and easiest checks before moving to more involved cleaning.
1. Turn off and unplug the vacuum
Switch the vacuum off and unplug it from the wall outlet. For a cordless model, remove the battery if the design allows it, or follow the manufacturer’s shutdown instructions.
If the vacuum was running hot, leave it to cool before handling it. A thermal protection system may shut a vacuum down when the motor overheats, but cooling the machine does not remove the blockage.
Do not test suction by putting your hand over the hose while the vacuum is connected to power. Keep fingers, hair, clothing, and loose objects away from the brush roll and moving parts.
2. Empty the dust cup or replace the bag
A full container can restrict airflow and make a clear hose appear blocked.
- Empty a bagless dust cup over a trash container.
- Replace a disposable bag when it is full or when the manual recommends replacement.
- Check that the dust cup, bag collar, and lid are seated correctly.
- Remove compacted debris near the vacuum’s inlet.
If the machine has a washable filter, do not reinstall it while wet unless the manufacturer specifically allows that procedure. Many filters must dry completely before the vacuum is used.
3. Disconnect the hose and inspect both openings
Remove the hose from the vacuum body, wand, and floor head as far as the design permits. Some hoses twist off; others release with a button or locking collar. Do not yank a permanently attached hose.
Use a flashlight to look through each opening. Check for:
- Wadded paper
- Fabric or socks
- Pet hair packed into a ball
- Plastic wrappers
- Small toys
- Leaves or dry debris
- A collapsed or twisted section of hose
A blockage near either end can be difficult to see because the connector may be narrower than the flexible middle section.
4. Remove visible debris by hand
If debris is visible at the opening, pull it out carefully. Wear gloves if the material is dirty or unknown.
Do not force your fingers deep into a narrow connector. You may push the obstruction farther inside or damage your hand on hidden sharp material. If you encounter broken glass, needles, metal, or another hazardous object, avoid handling it directly and seek appropriate assistance.
5. Push the blockage out with a blunt tool
For a dry clog, insert a long, blunt, flexible tool from the wider end of the hose. A plastic hose-cleaning tool is preferable. A broom handle may work for a straight hose, but it can damage a corrugated hose if forced.
Use slow, gentle pressure:
- Support the hose so it does not bend sharply.
- Insert the tool only far enough to contact the obstruction.
- Push toward the nearest exit.
- Pull the tool out and remove loosened debris.
- Repeat from the opposite end if necessary.
Do not use a coat hanger, screwdriver, knife, or other sharp metal object. These can puncture the hose, catch on internal ribs, or create a leak that causes continuing suction loss.
6. Wash the hose only when the manual allows it
Some vacuum hoses can be rinsed, while others contain electrical wiring, controls, fabric layers, or components that should not be submerged.
If the hose is documented as washable:
- Remove it completely from the vacuum.
- Rinse it with lukewarm water.
- Use a small amount of mild dish soap only if needed.
- Flush loosened debris toward the hose opening.
- Rinse until the water runs clear.
- Hang or place the hose so air can circulate through it.
- Let it dry fully before reconnecting it.
Never use a wet hose on a standard household vacuum. Moisture can damage electrical parts, promote odor, and create a shock or fire hazard. A wet/dry shop vacuum is different, but its filter and operating mode must still match the manufacturer’s instructions.
7. Check the wand, floor nozzle, and brush roll
If the hose is clear but suction remains weak, inspect the connected parts. A clog often sits in the narrow tube between the hose and floor head.
Remove hair and fibers from the brush roll according to the manual. Check the nozzle opening for flattened debris. On some models, the brush roll or lower plate can be removed; on others, access should be performed only by a service technician.
Do not run the brush roll while the vacuum is unplugged only if the model has a manual rotating mechanism. Keep the vacuum disconnected from power during all inspections.
8. Reassemble and test briefly
Reconnect every part securely. Check that:
- The hose is fully seated
- Release buttons or collars are locked
- The dust cup or bag is installed correctly
- Filters are correctly positioned and dry
- No gasket is folded or missing
Run the vacuum for a short period. Listen for normal airflow and check whether suction has returned at the floor head. Stop immediately if you hear grinding, smell burning, see smoke, or feel excessive heat.

How to Find the Exact Location of the Blockage
If the hose appears clear but the vacuum still performs poorly, isolate each section rather than repeatedly running the complete machine.
| Symptom | Likely area to inspect | Useful check |
|---|---|---|
| Strong suction at the hose but weak suction at the floor | Floor head, wand, or brush roll | Disconnect the floor head and inspect its airway. |
| Weak suction directly at the hose | Hose, inlet, filter, bag, or dust cup | Test only as described in the manual; inspect for leaks and restrictions. |
| Vacuum makes a whistle or hissing sound | Hose crack, loose seal, or gasket | Bend the hose gently and look for splits or gaps. |
| Motor sounds normal but no debris moves | Blockage downstream from the hose | Check the wand and nozzle opening. |
| Vacuum shuts off after several minutes | Restriction, clogged filter, or overheating | Turn it off, let it cool, and inspect airflow paths. |
| Suction is weak everywhere after a spill | Moisture or a wet filter | Stop using the vacuum and follow the manufacturer’s drying and service instructions. |
A useful diagnostic principle is to work from the cleaning head toward the motor, checking one removable section at a time. This prevents you from replacing parts before confirming where airflow stops.
Do not operate the vacuum with a component removed unless the owner’s manual specifically describes that test. Some vacuums depend on correctly installed filters or seals to protect the motor.

What to Do If the Vacuum Hose Is Still Clogged
If a gentle push from both ends does not clear the hose, the obstruction may be compressed, lodged behind a bend, or located in a nonremovable section.
Try these options:
- Inspect the hose under bright light while gently flexing it.
- Check every connector, bend, and narrow opening.
- Use a manufacturer-approved hose-cleaning tool.
- Replace the hose if it is crushed, split, or internally damaged.
- Contact the manufacturer if the hose contains wiring or control buttons.
- Take the vacuum to an appliance repair shop if the motor continues to overheat.
Do not use compressed air unless the manufacturer allows it. High-pressure air can drive debris deeper into the vacuum, release dust into the room, or damage seals and filters.
A vacuum hose with a persistent odor may contain trapped organic material, damp debris, or mold growth. Cleaning may not remove the smell if the hose has remained wet for an extended period. Replacement can be more practical than continued washing, particularly when the material is porous or the hose cannot dry completely.

Common Mistakes to Avoid
Using a sharp object
Knives, screwdrivers, and wire hangers can puncture flexible hose walls. Even a small hole can cause a permanent suction leak.
Running the vacuum repeatedly while it is blocked
A restriction can reduce cooling airflow and increase motor temperature. Repeated testing may worsen the problem or trigger thermal protection.
Washing an electrical hose
Some hoses contain wiring for power heads, switches, or automatic controls. Submerging them can damage the hose and create a safety hazard.
Reinstalling a wet filter
A wet filter can restrict airflow and may damage the vacuum. Follow the drying time and replacement instructions for the specific filter.
Ignoring a burning smell
A burning odor can indicate a jammed brush roll, slipping belt, overheated motor, or electrical fault rather than an ordinary hose clog. Disconnect the vacuum and stop troubleshooting if the smell continues.
Assuming weak suction always means a clog
Full bags, dirty filters, poor seals, worn belts, cracked hoses, and blocked floor heads can produce the same symptom. Check the entire airflow path.

When to Replace the Hose or Call for Repair
Replace the hose when it has a visible split, crushed section, loose connector, damaged electrical contact, or persistent loss of suction after cleaning. A temporary tape repair may reduce airflow and usually does not restore the hose’s original strength.
Seek professional service when:
- The vacuum sparks or trips a circuit breaker
- The motor produces smoke or a persistent burning smell
- The blockage may contain hazardous material
- The hose cannot be removed without disassembly
- The vacuum overheats even after filters and airflow paths are clear
- Internal wiring or electronic controls are involved
- The appliance is under warranty and opening it could affect coverage
For central vacuum systems, a clog may be inside the wall piping rather than the flexible hose. If the hose and inlet are clear, check the manufacturer’s troubleshooting instructions before attempting to access pipes or the power unit.

Key Takeaways
- Unplug the vacuum before inspecting or clearing any hose.
- Empty the dust cup or replace the bag before diagnosing a clog.
- Check the hose, wand, floor nozzle, brush roll, filters, and seals.
- Use a blunt, flexible tool rather than a sharp metal object.
- Wash a hose only when the manufacturer says it is washable.
- Dry all washable parts completely before reassembly.
- Stop using the vacuum if it overheats, sparks, smokes, or smells burnt.
- Replace a damaged hose instead of relying on a temporary patch.
Frequently Asked Questions
Can I use a broom handle to unclog a vacuum hose?
You can use a broom handle only if it fits easily and the hose is straight enough for the tool to pass without force. A plastic, blunt, flexible hose-cleaning tool is safer. Do not push hard through corrugated sections or tight bends.
Can I rinse a vacuum hose with water?
Only if the owner’s manual identifies the hose as washable. Hoses with electrical wiring, switches, or powered attachments should not be submerged. Any washable hose must dry completely before it is reconnected and used.
Why does my vacuum still have weak suction after I clear the hose?
The restriction may be in the floor head, wand, brush roll, filter, bag, dust cup, or vacuum inlet. A cracked hose or loose seal can also leak air. Inspect each section separately rather than assuming the hose was the only problem.
How do I unclog a vacuum hose without taking it apart?
Disconnect the hose if possible and inspect both openings. Remove visible material, then use a blunt flexible tool from the wider end. If the hose cannot be removed or contains wiring, follow the manual instead of forcing an object through it.
Is it safe to use a vacuum after it overheats?
Allow it to cool and inspect the complete airflow path first. If it overheats again, smells burnt, shuts off repeatedly, or shows electrical damage, discontinue use and arrange professional service.
Conclusion
To clear a clogged vacuum hose, disconnect the vacuum from power, empty its debris container, inspect every hose opening, remove visible material, and gently push out the blockage with a blunt tool. Clean the wand, floor nozzle, brush roll, and filters as well, because the obstruction may be outside the hose. Use water only on manufacturer-approved washable hoses, and stop troubleshooting when overheating, smoke, sparks, or electrical damage appear.
After the vacuum is clear, run a brief test and monitor suction, sound, and temperature. If airflow remains poor, a damaged hose, clogged filter, worn belt, failed seal, or motor problem may require a replacement part or qualified repair.



2 Comments